
September 20, 2018
How to Grow Your SMSBump Subscriber List with Justuno
We’re very excited to announce our newest integration with the popular Justuno Conversion Suite for Shopify!
Now you can combine the popular conversion app for on-site messaging with the sales-boosting impact of automated SMS Marketing notifications.
Results we’ve seen so far?
-
500% ROI in less than a week
-
6,000% ROI with a 30% Click-Through Rate (imagine the SMS template optimization possibilities)
Justuno lets you create popup notifications & promotions with highly customizable design. They can be used for different user segments such as new visitors, users with an exit intent, users who are leaving during checkout, or customers who are spending more time on your Shopify store.
For SMSBump, more phone numbers means more people receiving your text marketing messages, which means… tons more ROI.
How to connect SMSBump with Justuno?
- Create and customize your popup
- Paste the integration code
- Publish your popup and start collecting phone numbers
Requirements: What do I need to customize popups and get more ROI?
A Shopify store with Justuno and SMSBump installed.
Here we go!
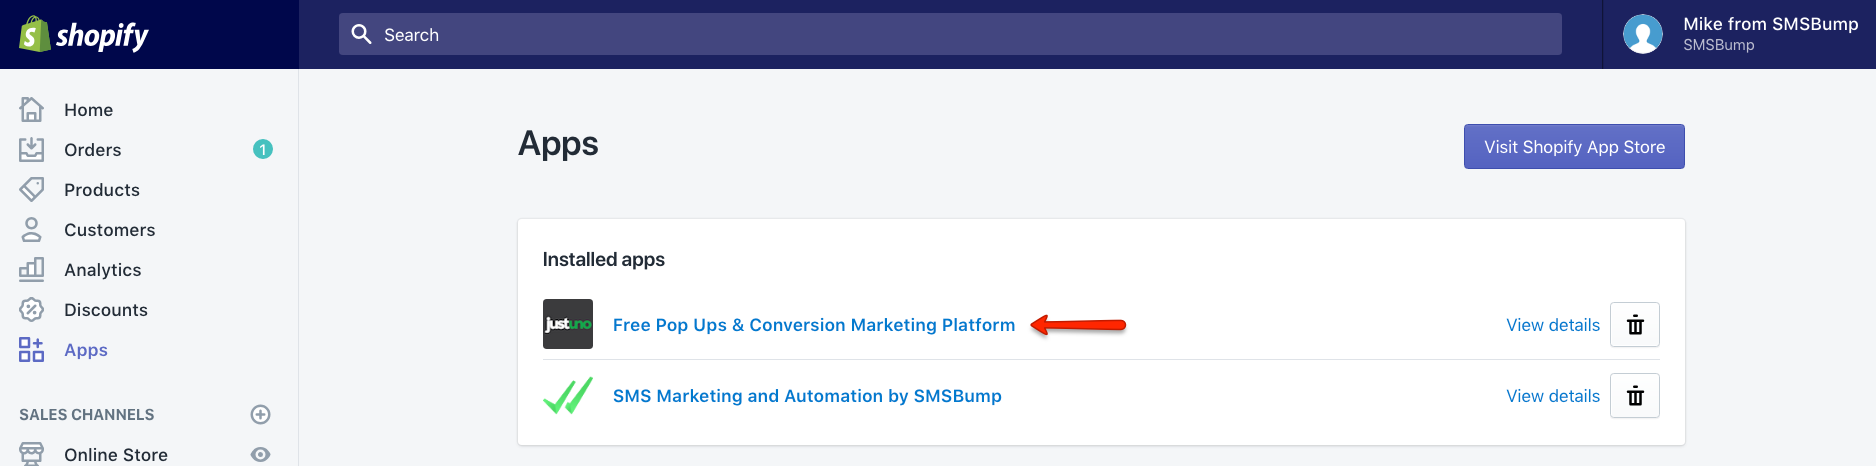
Step 1: Create a New Justuno Promotion
Once you enter your profile in Justuno, you will enter their Dashboard where you can create and manage your different popups (promotions).
Hit the New Promotion button and give a name for your new entry.

Click on Get Started.
Step 2: Select Preferred Devices
Now select the type of device your new popup should be optimized for. Desktop & Tablet or Mobile.

Pro Tip: You can create two different popups with the same purpose, one for Desktop & Tablet and another one for Mobile.
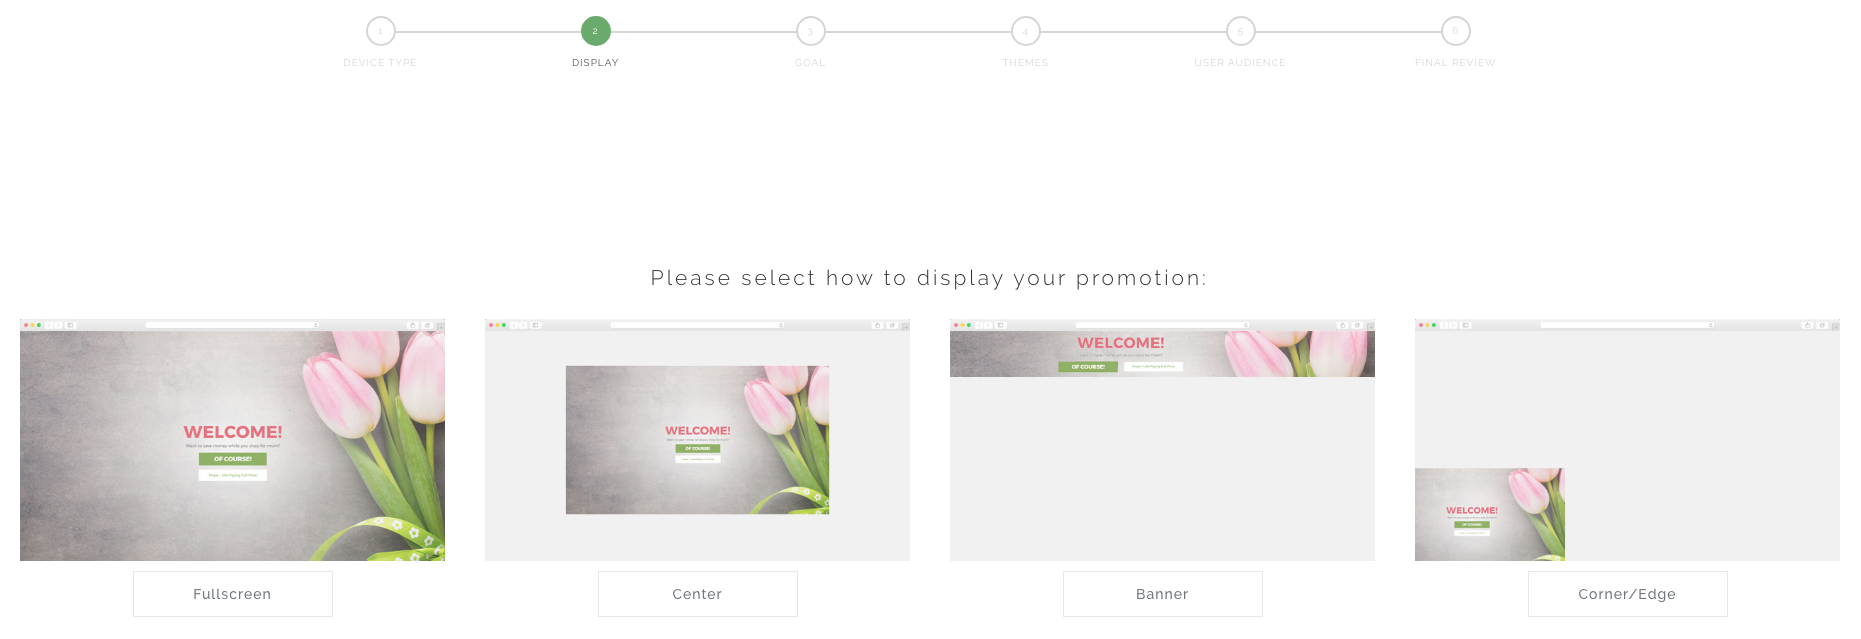
Step 3: Select Preferred Display Type
How big do you want the popup to be? Where should it be displayed?
Step 4: Select the Lead Capture Goal
You want to use the Lead Capture goal on the left so you can collect the phone numbers of incoming visitors.
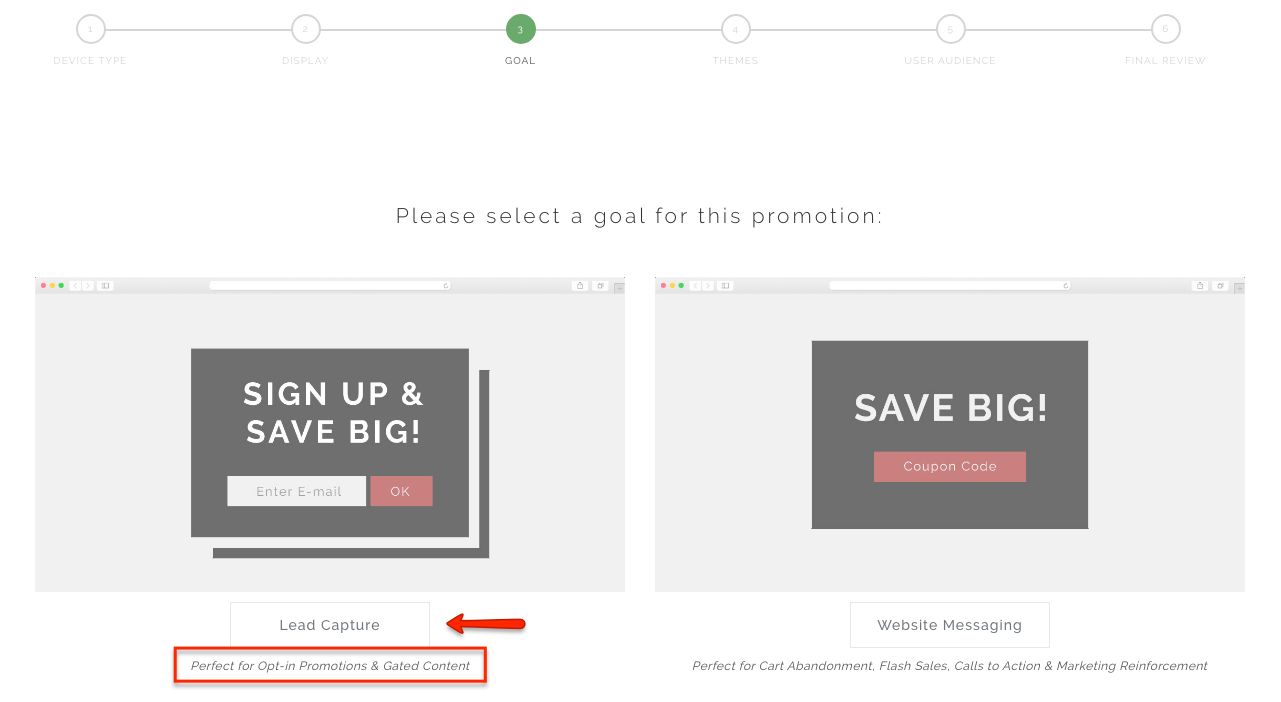
This is the option that Justuno offers for gathering emails by offering deals and exclusive content in return. In our case, we will modify this popup for collecting phone numbers.
Step 5: Select Your Favorite Popup Template
Choose the template you believe will suit your store design the most.
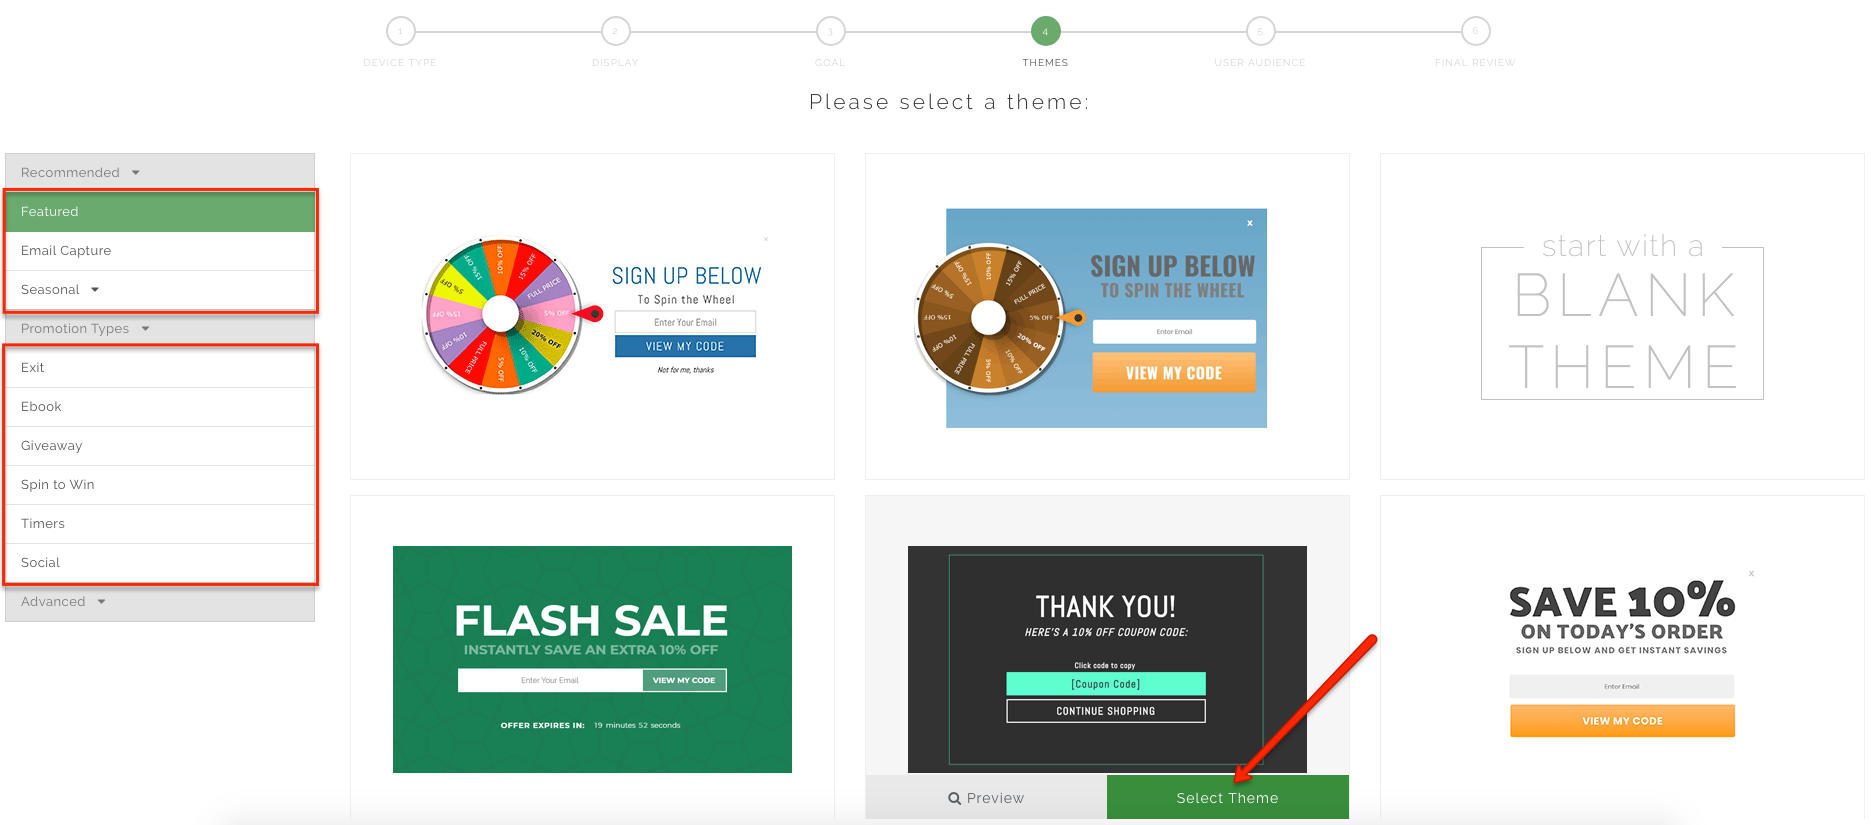
You can select between exit popups, flash sales, giveaways, and many more.
Step 6: Select Who Should See the Popup
Almost there.
You only need to select the exact part of the customer journey to trigger this popup.
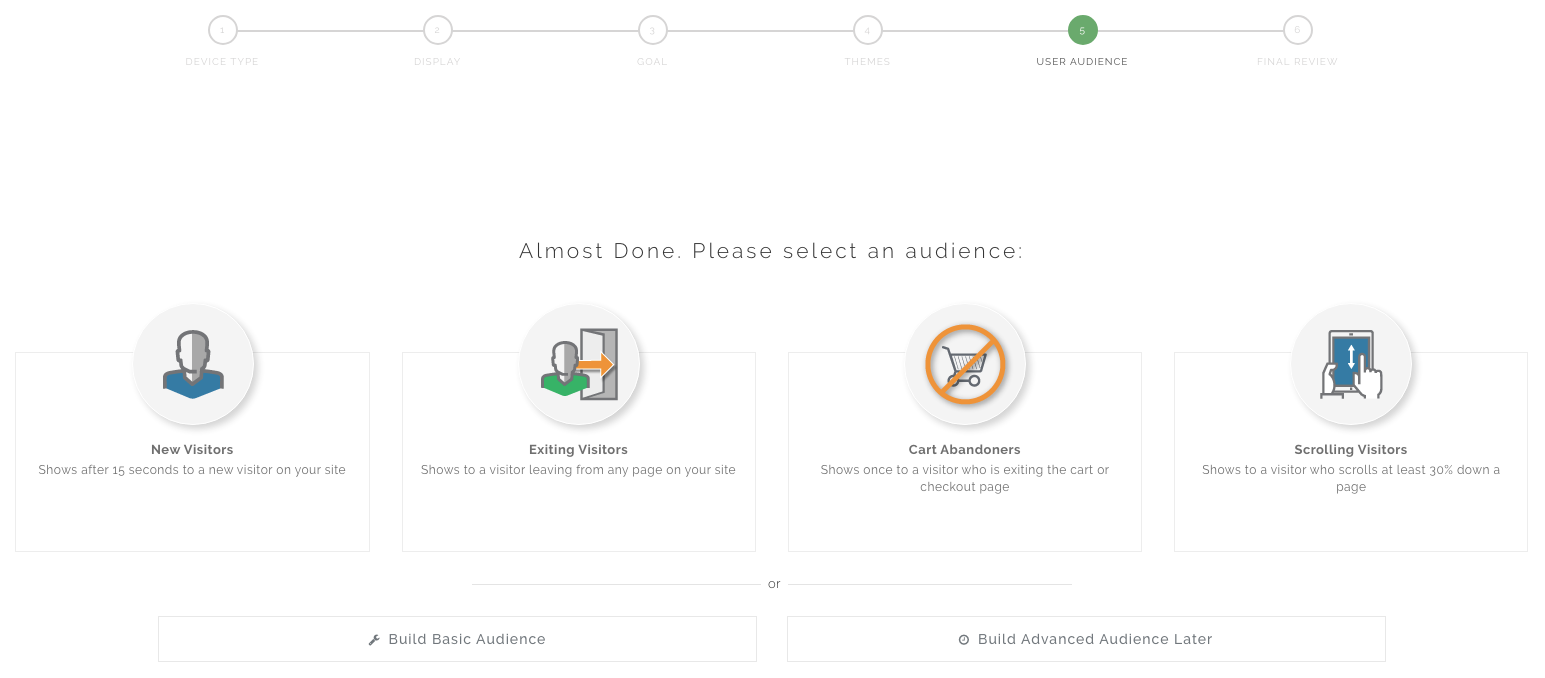
You can choose to show the Subscription form popup to new visitors, exiting visitors, cart abandoners or scrolling visitors. This is completely up to you.
Pro Tip: We suggest you start experimenting with each option to see which one gives you the best results.
Step 7: Customize Your Popup Design
Use the last step to customize the text and background of your popup.
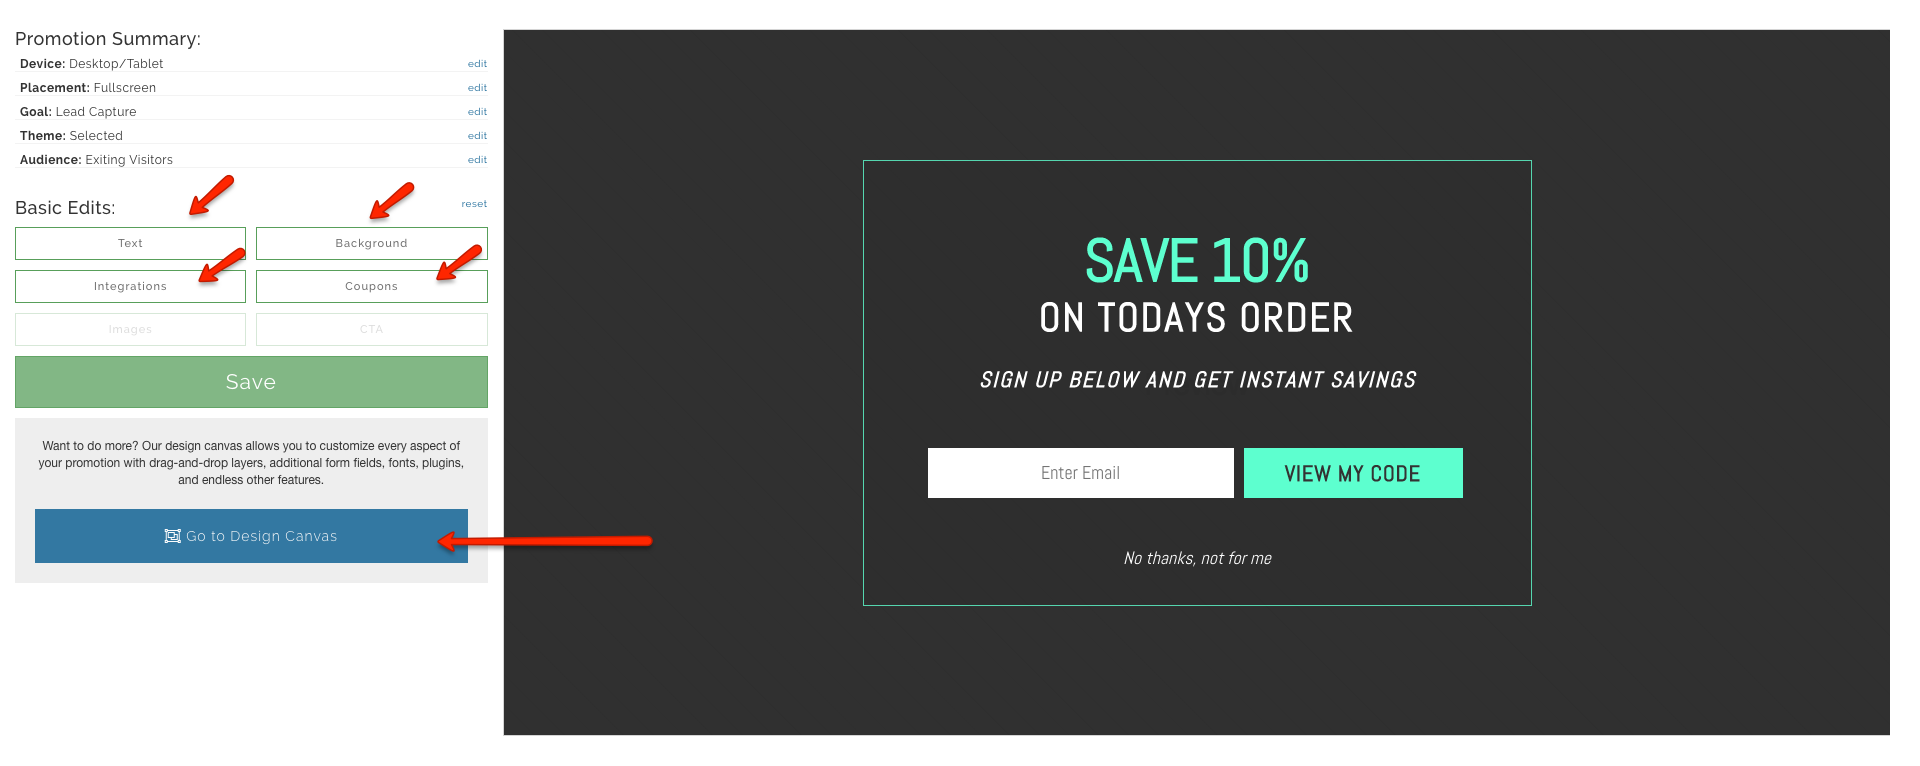
Once you’re ready to proceed, click the Design Canvas button to customize your popup in detail and most importantly - configure your integration.
In the editor, you can see how your popup will look in your Shopify store.
On the right, you have design customization options for the popup color, borders, effects and tons more.
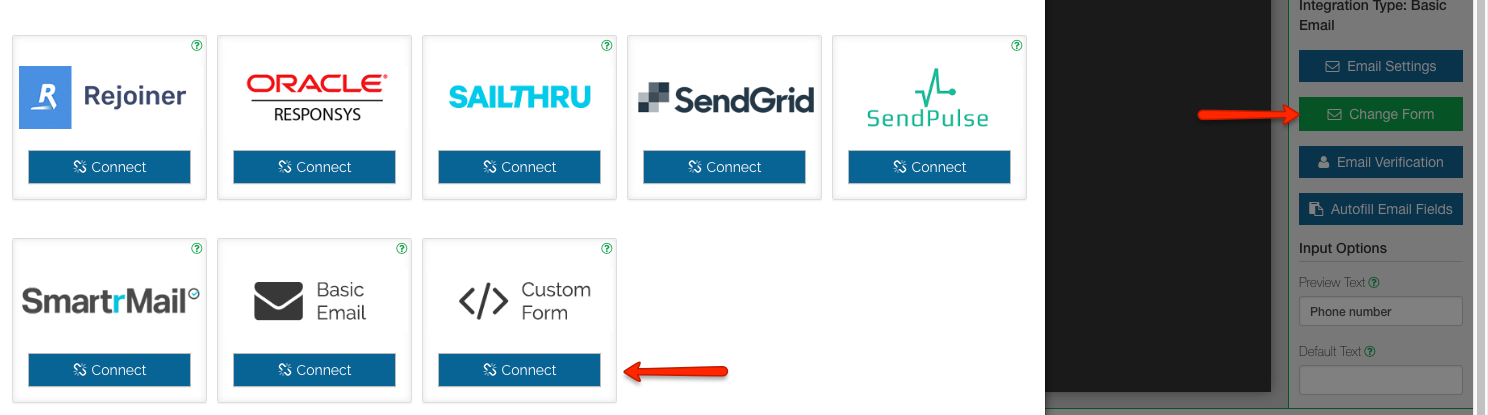
Below the Integration settings, you have a field where you can change the text in the phone number field from “Email” to “Phone Number” or anything you choose.
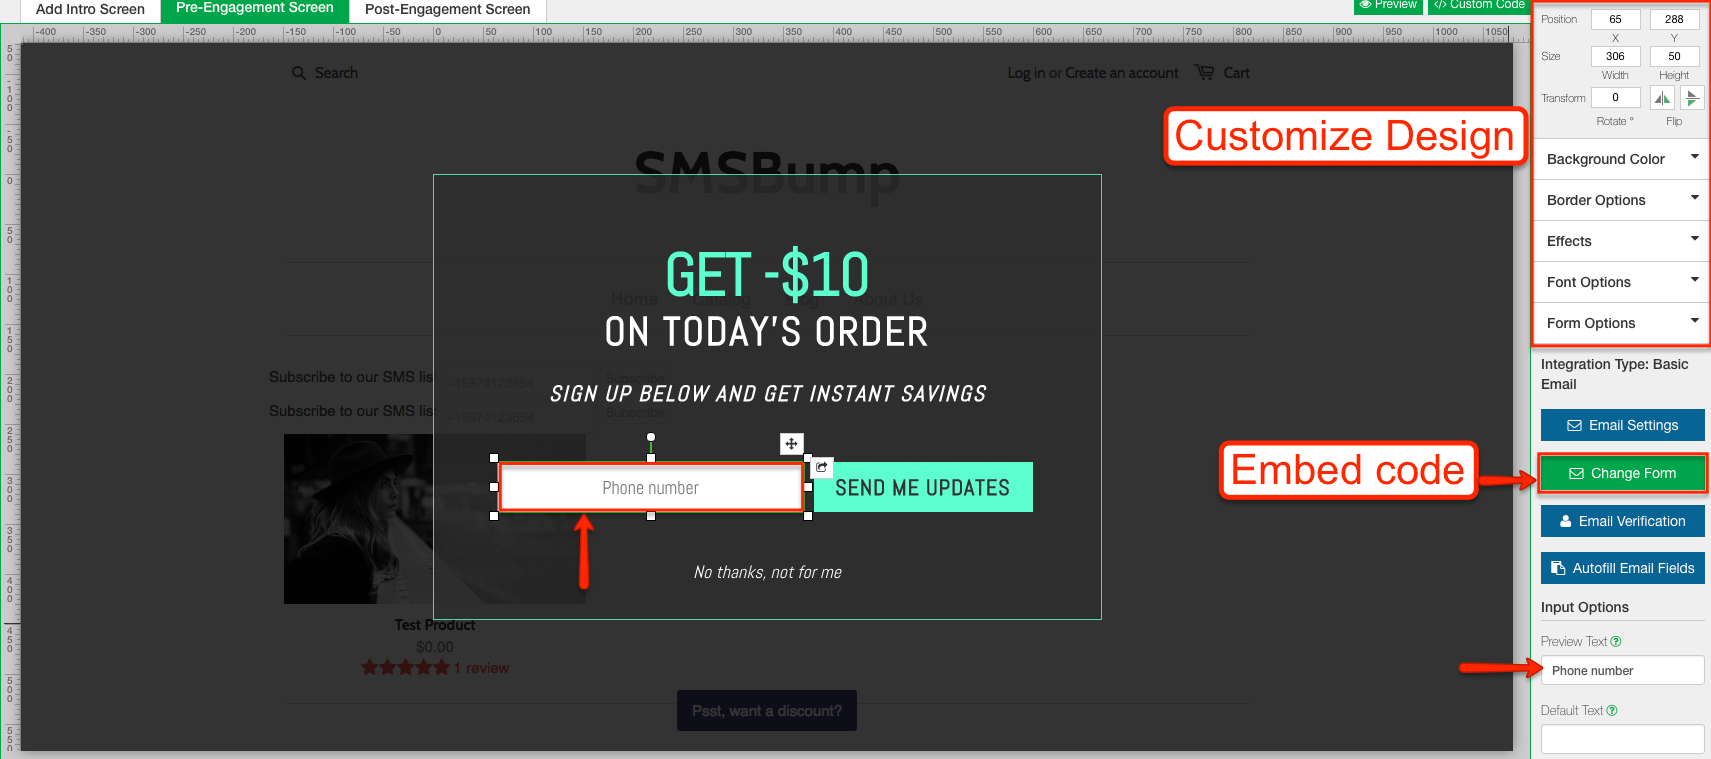
The Change Form button lets you setup your integration. Let’s show you how.
Step 8: Complete the Integration
Click Change Form.
Scroll down to “Custom Form” and click Connect.
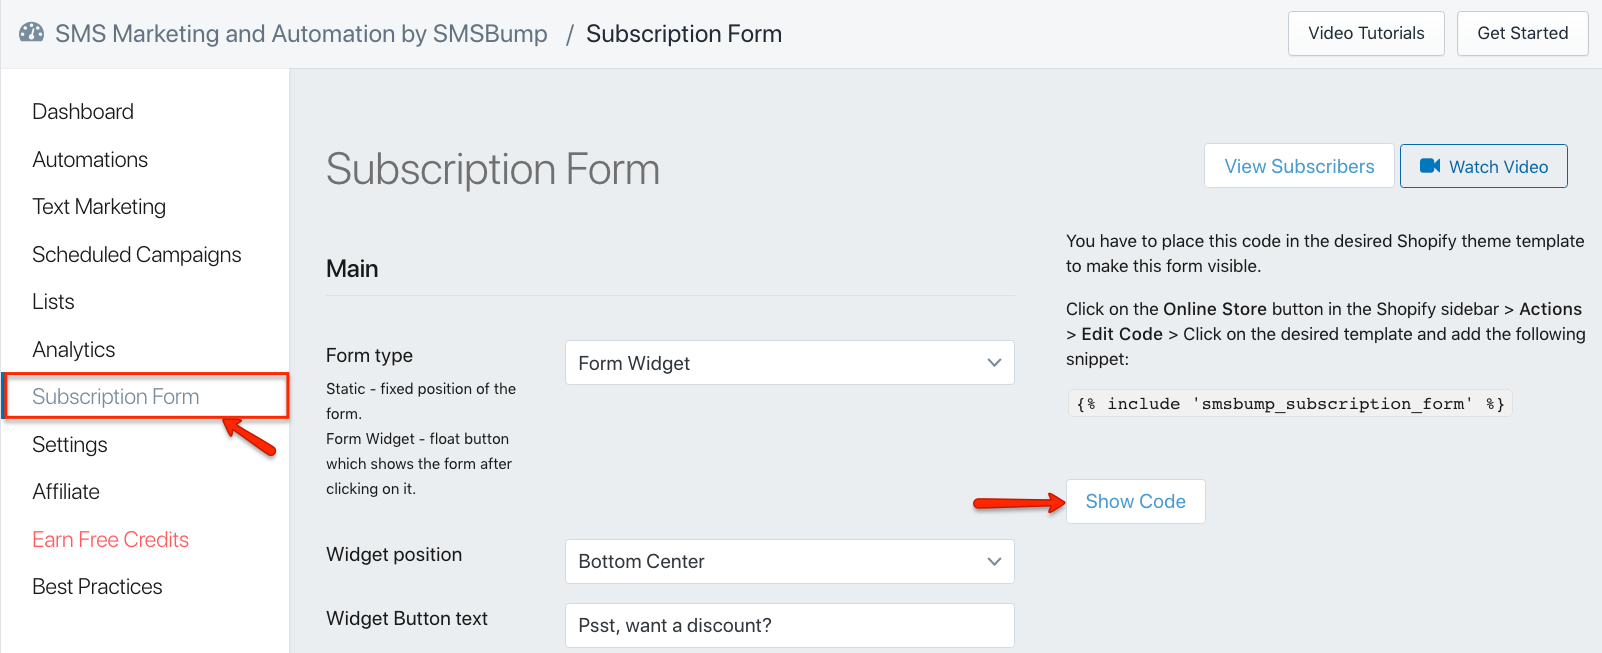
Go back to your SMSBump app in Shopify and click on Subscription Form.
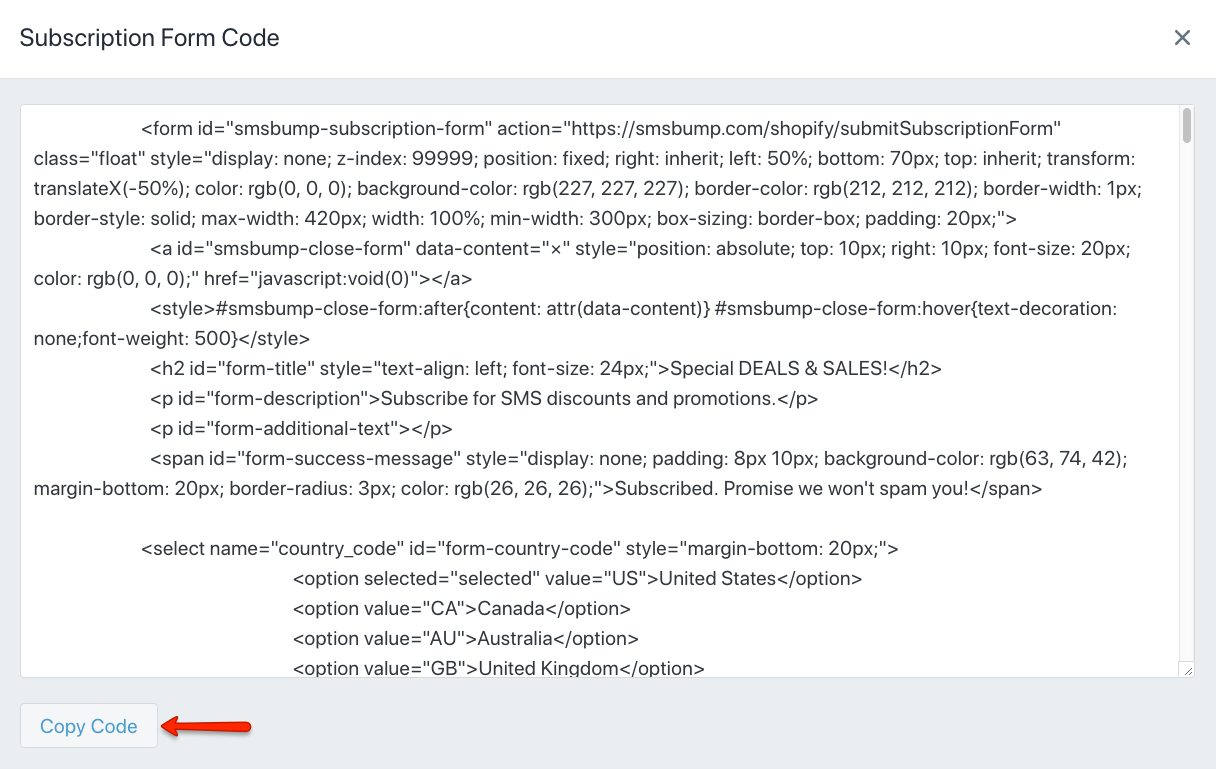
On the right, you have a button saying “Show Code”.
Now click the Copy Code button.
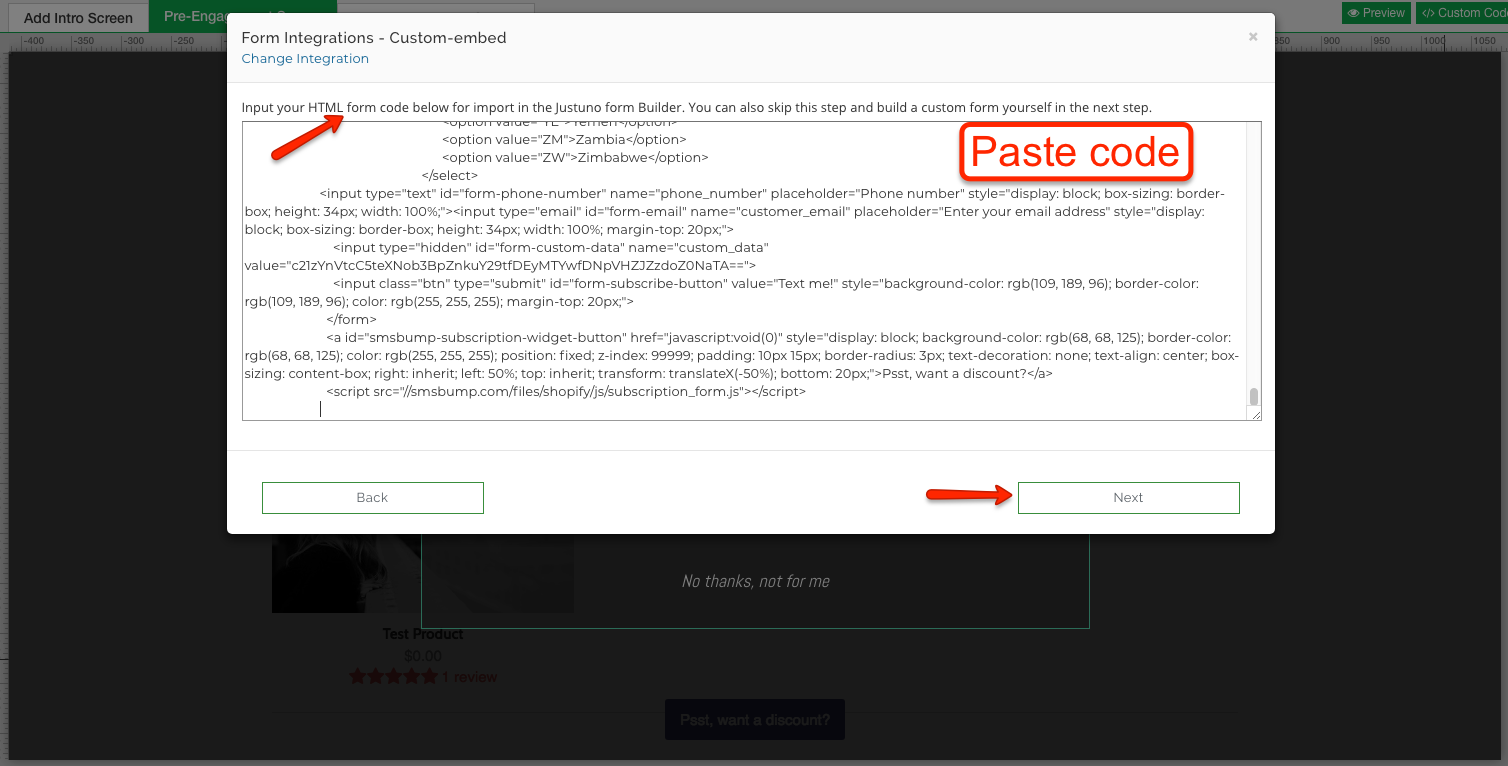
Go back to the Justuno dashboard and paste the code in the Custom-embed field for integrations.
Ready? Click Next.
You should see the final field where you confirm the Integration details and create your form.
- Country Code: The default country selection in the popup.
- Phone Number: The phone number field in the popup. Delete the entry from the field name and leave it blank.
- Customer Email: This field should be removed, since you’re gathering phone numbers.
- Field Name: Enter the content on the phone number confirmation CTA button.
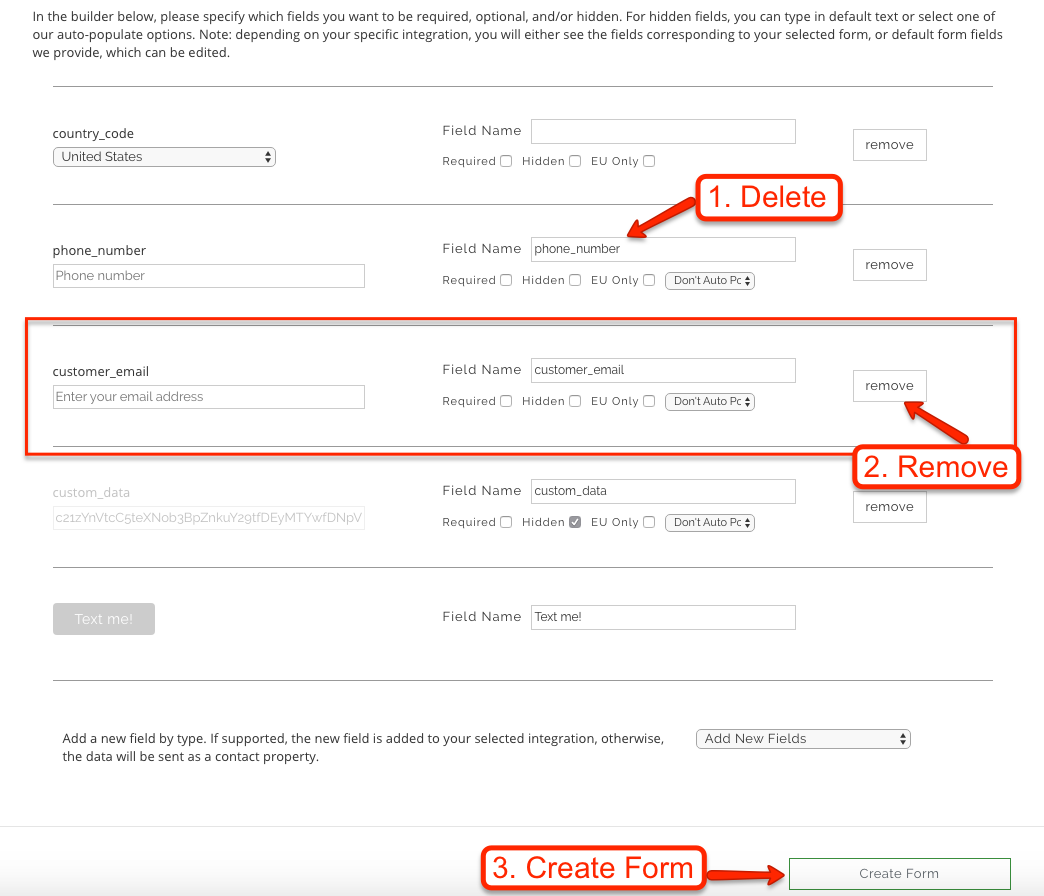
When you’re all set, click on Create Form.
Finish Your Popup Design
Once you have the integration set, you can finalize the design and layout of your popup.
Once you’re done, hit the blue Publish button down on the right and your new Subscription form popup is all done!
Now you know how to create awesome looking, properly timed and targeted subscription form popups in Shopify.
Step 9: Setting the Autoresponder
Send Welcome texts for your new subscribers coming in from your Justuno popup form.
Once a new subscriber has entered their phone number, you need to send them a confirmation message. Of course, this is a process that SMSBump automates with the New Subscriber Confirmation.
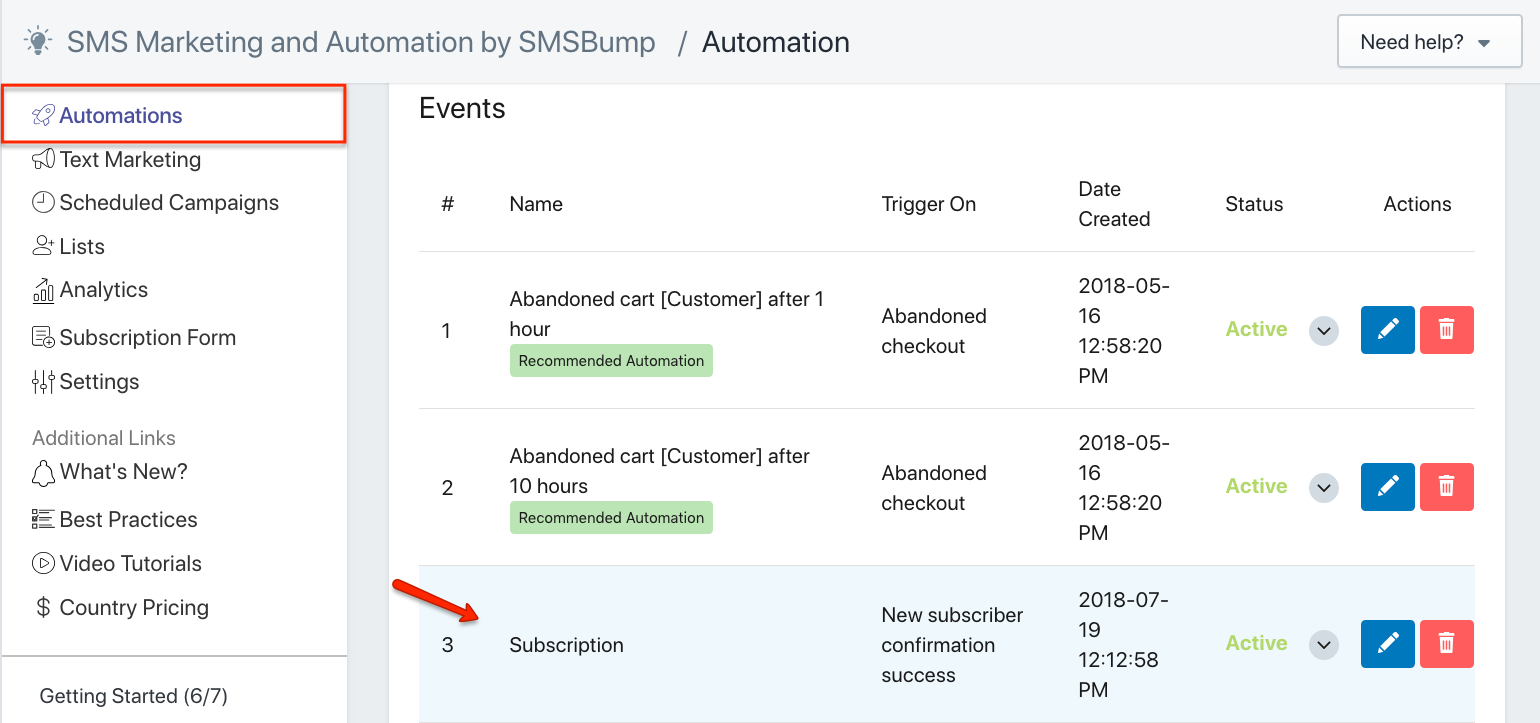
Go to SMSBump > Automations > Create New Automation
Select the New Subscriber Confirmation Success in the Event field.
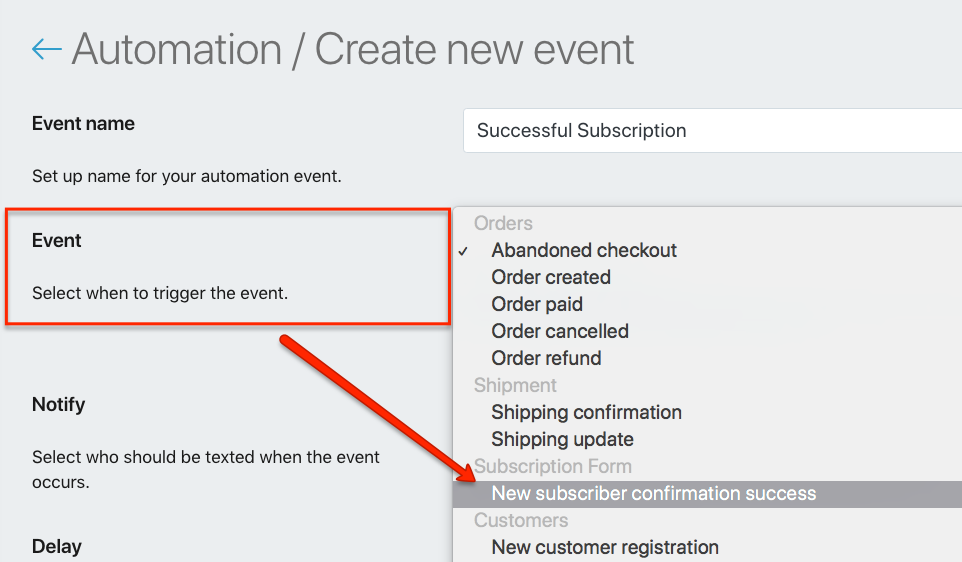
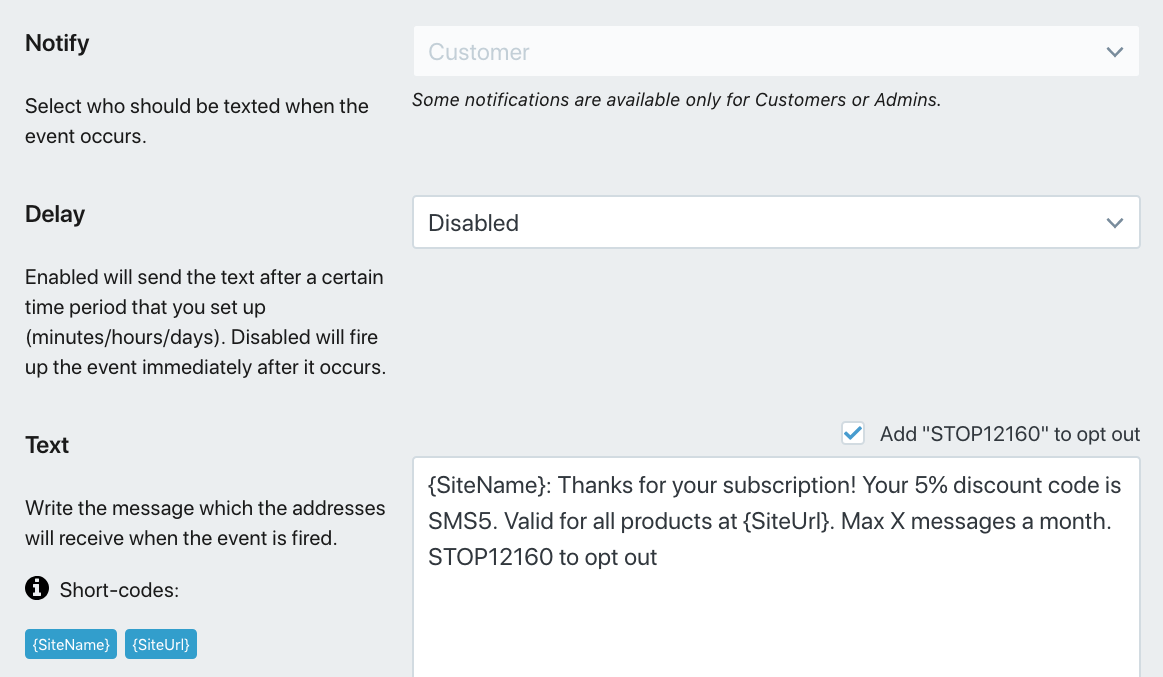
Configure your confirmation automation and Save it.
Set the Notify field to Customer.
Delay should be Disabled so the customer receives their confirmation right away.
Your text message should be short and focus on the value you offer to your new subscriber.
Step 10: Subscriber Confirmed!
When a visitor subscribes they will be automatically added to the Text Marketing Lists.
Their phone number will appear here:
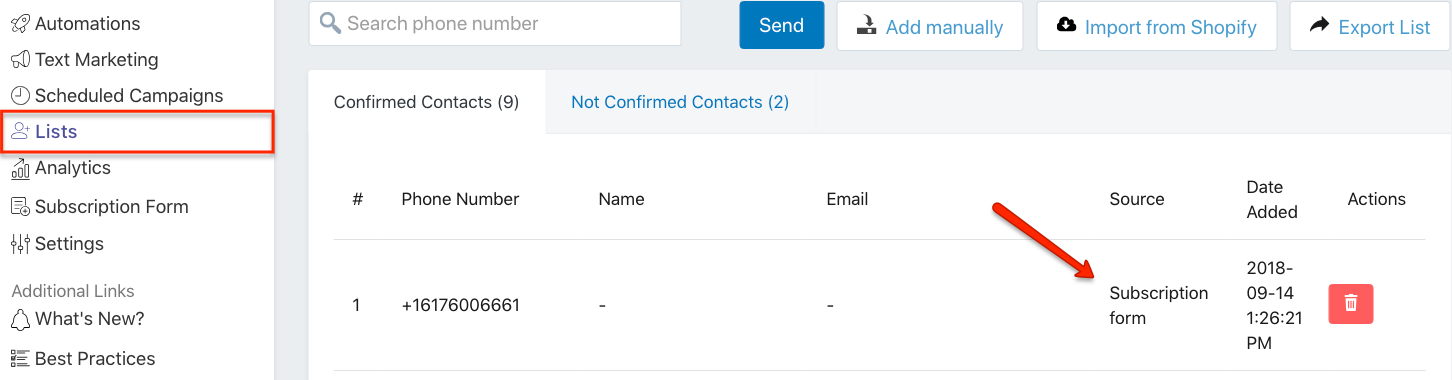
You will know where they came from in the Source tab displaying the Subscription form.
Get Creative
Start building up your SMS marketing lists to grow the revenue and ROI from your text message automations.
Automate your abandoned cart recovery, new order & shipping updates, signups and start boosting the sales with specials, deals and personalized offers at your customers’ fingertips!

Mihail Savov
Start growing today
Sign up today and join 90,000+ eCommerce businesses making it big with Yotpo SMSBump