

July 30, 2018
How to Run an SMS Marketing Campaign in Shopify
In this section we will share some good practices when composing text message campaigns. It doesn’t matter if you are creating a campaign for Shopify Customers, Lists or Specific Numbers. There are a few important things to consider so we will focus on each of them individually.
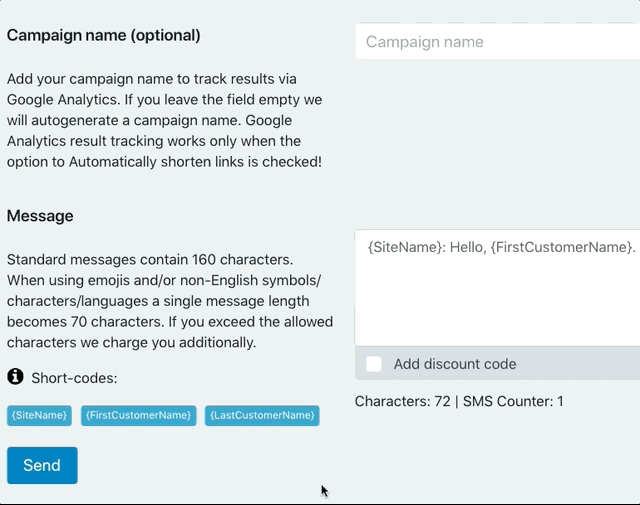
Go to Text Marketing
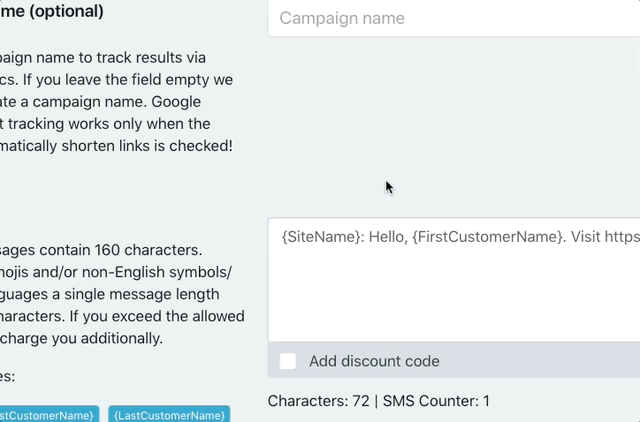
Scroll all the way down to Message so we can observe the field where you configure your SMS.
Tip 1: Use your brand name
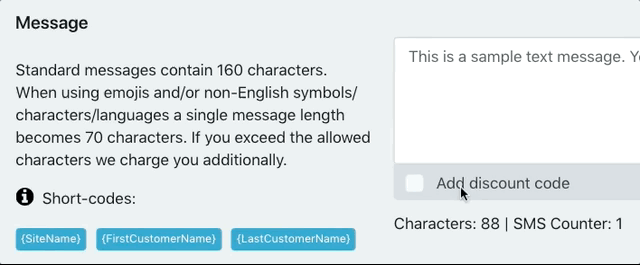
Start the message with {SiteName} tag or include it somewhere in the message. This way, customers will immediately recognize whom the message is coming from.
Tip 2: Make it personal

Use the {FirstCustomerName} tag when composing the text message. Don’t worry if you don’t have the customer’s First Name. SMSBump will leave a blank.
Tip 3: Be concise
Be straight to the main point of your offer. Customers should understand what your main message is instantly. For instance:
- Flash Sale 5% OFF on everything
- Easter Holiday Discount: Get 10% OFF
- Black Friday up to 80% OFF
- $5 OFF when you spend more than $25
Tip 4: Link your site properly

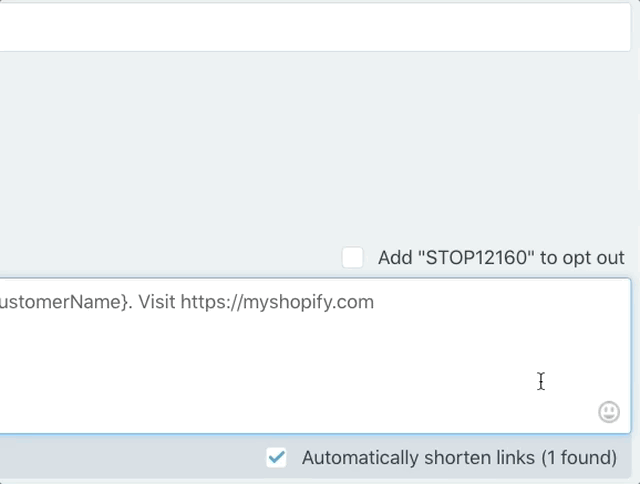
Do not forget to paste your site as https://myshopify.com. Some mobile operating systems do not recognize the format myshopify.com or www.myshopify.com so your link might not color up and thus customers won’t be able to click it. Always paste your links as https://myshopify.com.
Tip 5: Shorten your links to save space and track results
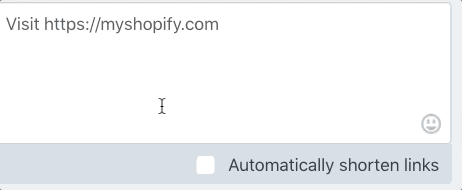
Use the SMSBump Link shortener. The Automatically shorten links checkbox must be selected and you need to see at least 1 link found.
When you use the SMSBump link shortener, the app automatically shortens your link.
This means that it takes less characters and also allows SMSBump to track your campaign results for customers who purchased via their mobile devices.
The shortened link will look like this: https://smsb.co/sjwJWa
Tip 6: Pair the link with a discount
To ease up your customers, you can embed a discount to the link. This way they don’t have to enter the discount code (although some might prefer to enter it manually).
Click the Add discount code checkbox on the bottom left. This will trigger a pop up with all your available Shopify discount codes displayed.
Here is a video for more info on how the discount codes work:
Video tutorial: Watch here.
Select the discount code you want to use from the dropdown and click Apply discount code.
Once the discount is applied it will be displayed in brackets.
The discount code gets automatically applied when the customer clicks your checkout link. No need for the customer to enter the code.
Always make sure to have the STOP#### checkbox selected in the Text Area.
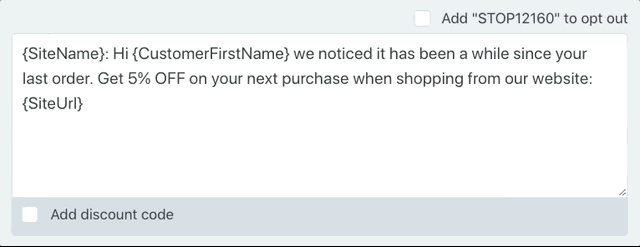
Important: Please mind that the digits after STOP in your SMSBump account will be different from the ones in the screenshot and will NOT show “12160”.
Tip 7: Verify the campaign parameters
When you are ready go, click Send. You will see a screen with a campaign summary before sending the campaign out.
Pay attention to:
- SMS Count: Should be 1 or you will be charged additionally
- Shorten Links: Should be Yes (recommended)
- Unsubscribe Text Included: Yes (recommended)
If all is well, click Yes, go ahead. If you have some tweaks to do, then click No, cancel.
Bonus: Emojis
Emojis are extremely powerful and can be added to messages.
You can spice up campaigns and give them an edge by choosing between a ton of emojis. Once you select the emoji, just click on it and it will appear in your text message.
Important: When using emojis your text per message goes from 160 symbols to 70 symbols because of the special encoding emojis use!
Video tutorial: Watch here.

Mihail Savov
Start growing today
Sign up today and join 90,000+ eCommerce businesses making it big with Yotpo SMSBump