
April 4, 2019
Don't Miss a Text with the New Zendesk & SMSBump Integration
The new Zendesk integration with SMSBump lets you connect your support platform with your favorite text messaging app.
This way, you can keep a constant eye on your SMS Chat even if you’re not currently in the SMSBump app.
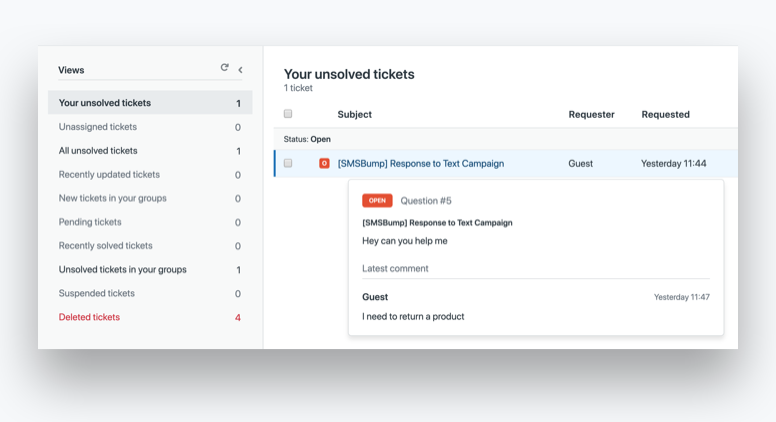
Each time a customer replies to any of your messages, it will now also appear in your Zendesk system in the form of a new ticket.
Never miss a chat reply and always be ready to text back with a response straight from Zendesk!
That’s right, you can reply to the text message from Zendesk and it will automatically send the reply via SMS straight back to your customer.
How to Connect SMSBump and Zendesk
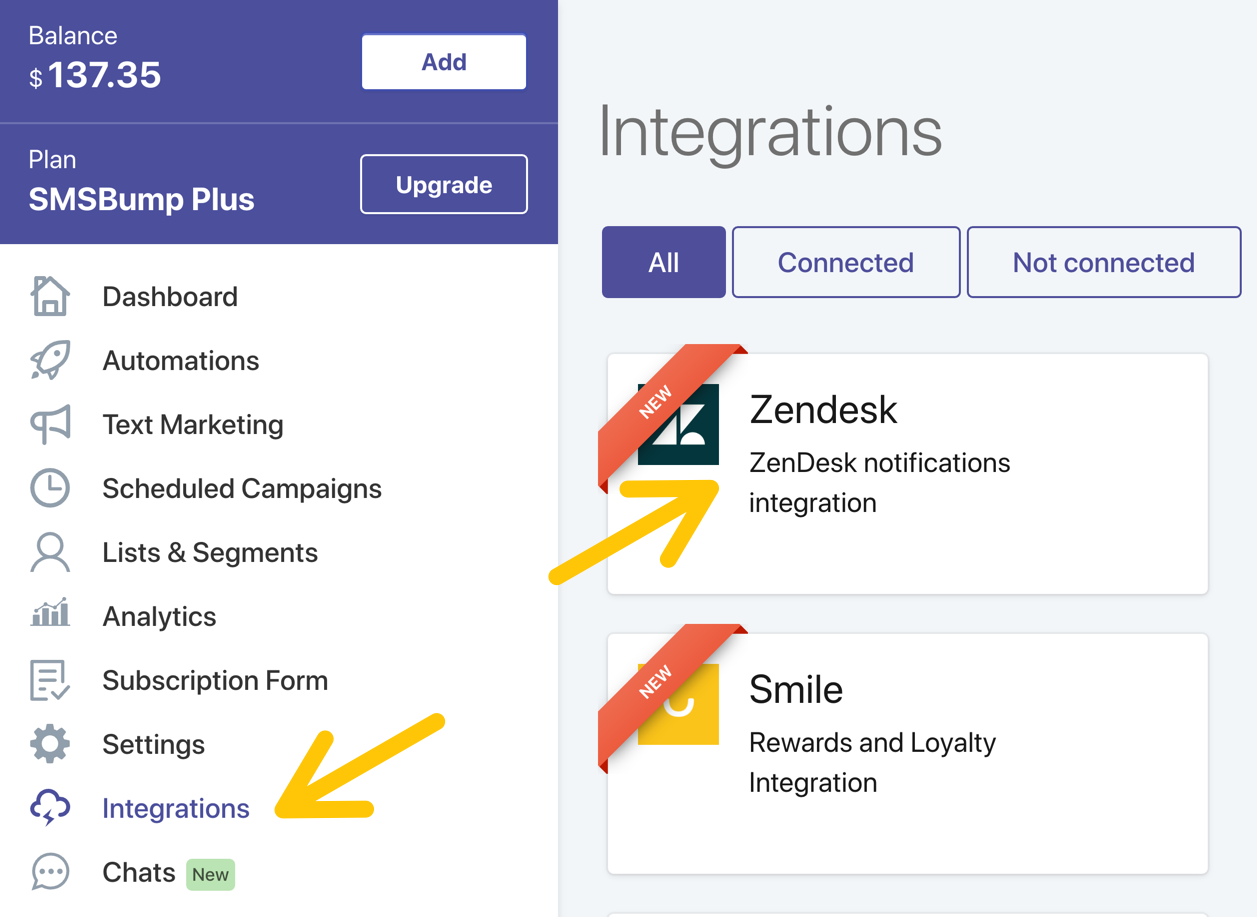
To enable Zendesk for SMSBump, go to your dashboard and click on Integrations.
You’ll see the Zendesk integration with a label “NEW”. Click it.
This is the Zendesk integration overview.
To begin, click on the Zendesk link and log into your account. In case you don’t have an account but want to use the integration, you’ll need to create one.
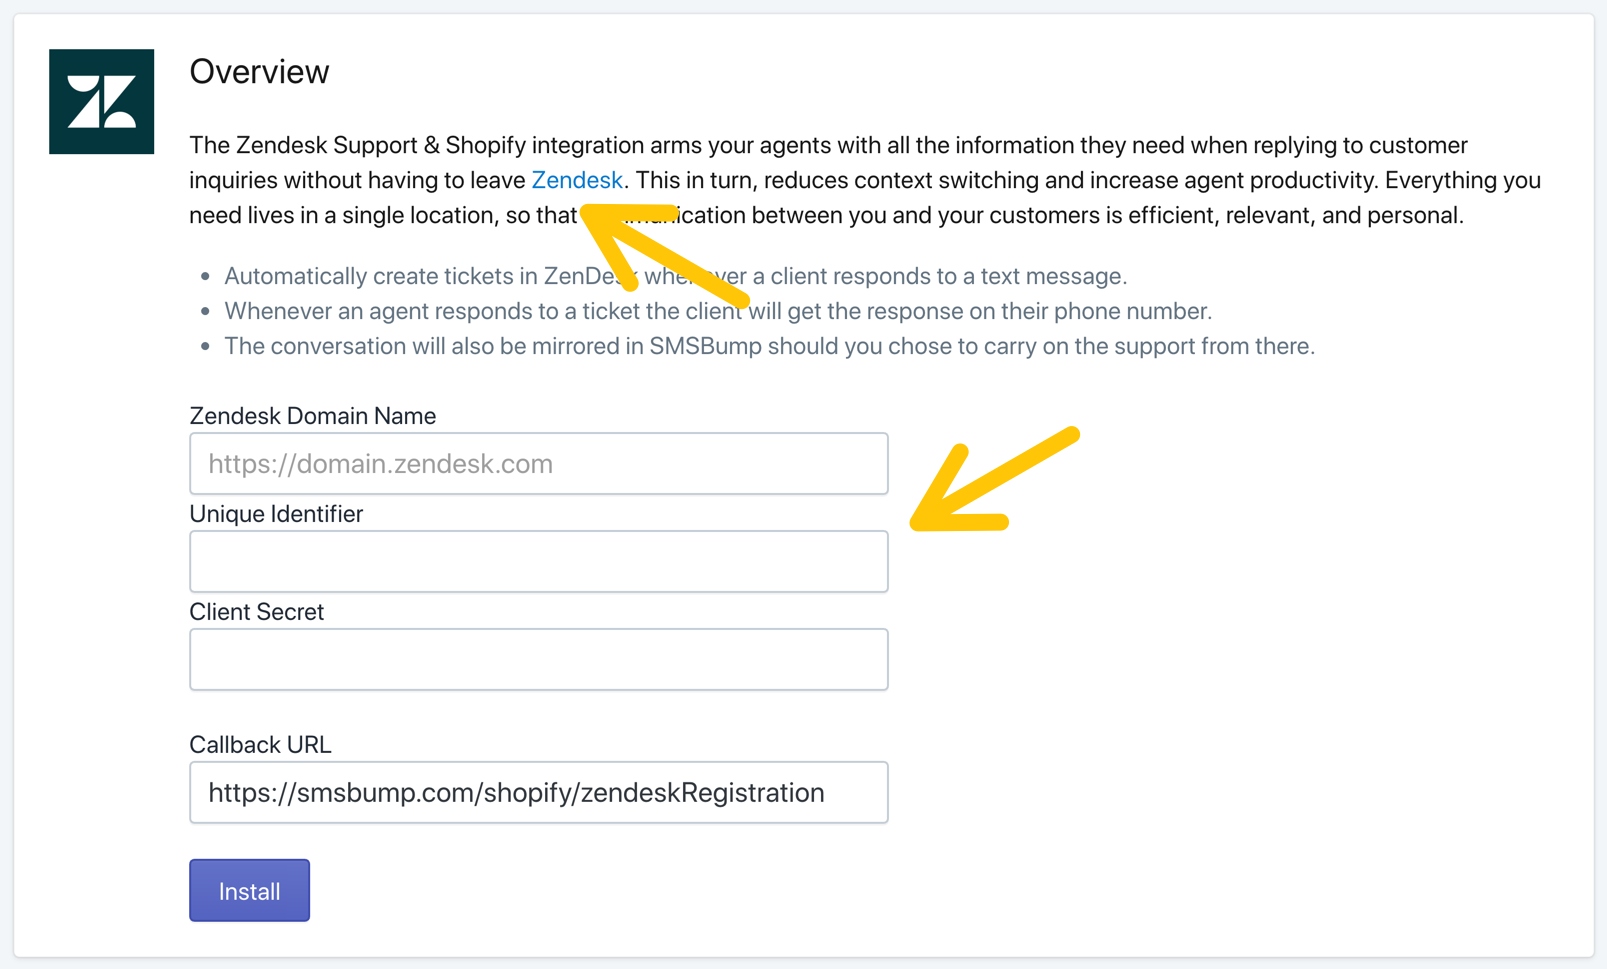
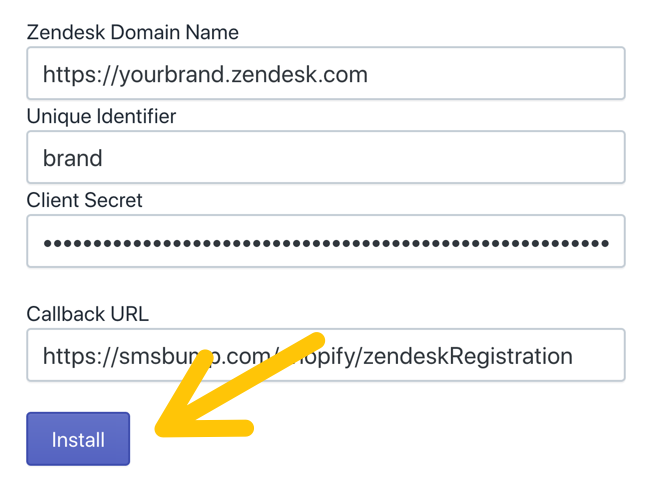
These are the required fields you need to configure before you install the integration.
Zendesk Domain Name
This is the domain of your Zendesk account. For example "https://yourbrand.zendesk.com"
Unique Identifier
This is the name of your client and can be whatever you decide. It’s configured in the Zendesk settings that you’ll see a bit below.
Client Secret
This is the secret token used by SMSBump to connect to your Zendesk client. You will reveal it after you configure your OAuth settings below.
Callback URL
This is the URL you need to paste into your Zendesk OAuth settings.
Let’s start!
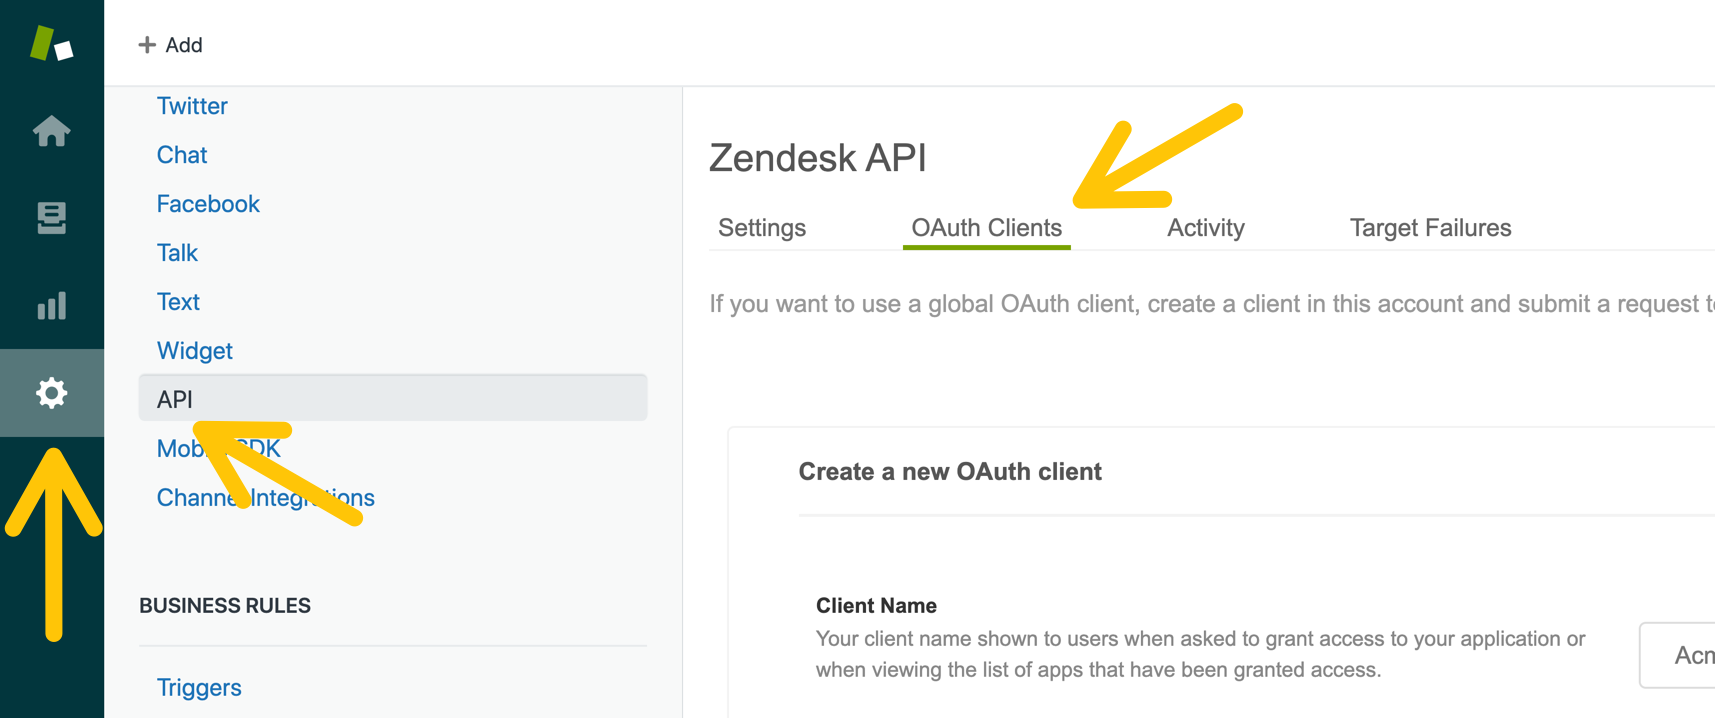
1. Go to your Zendesk account and click on your Settings.
2. Click on API.
3. Click on OAuth Clients.
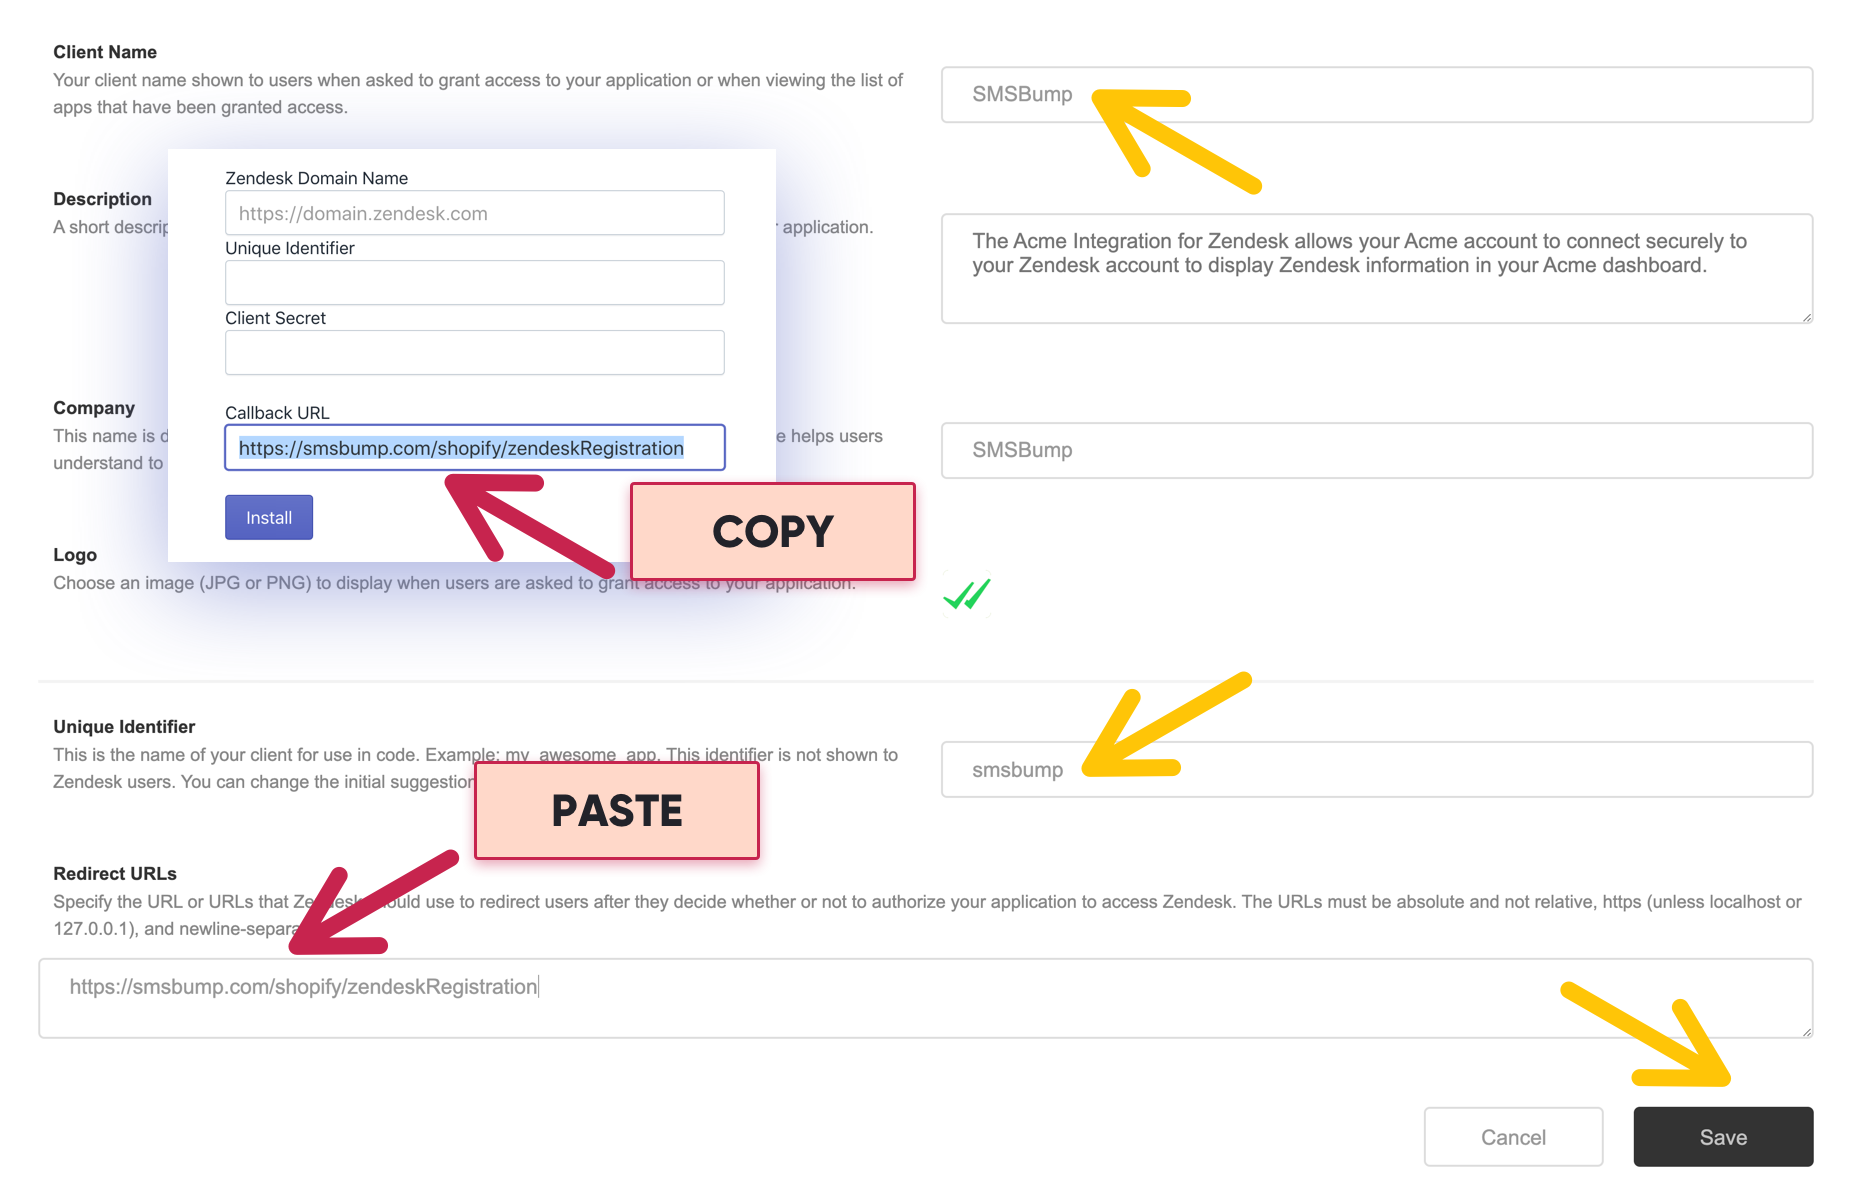
4. Enter a Client Name (Your brand name for instance).
5. Enter a Unique Identifier (Your brand name for instance).
6. Copy your Callback URL (From SMSBump) to your Redirect URLs field.
Now click Save.
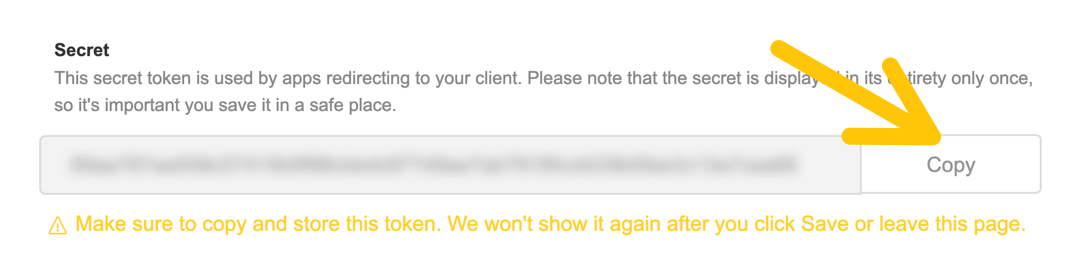
The Client Secret should appear right now.
7. Click the Copy button and go back to your SMSBump app.
To avoid any connectivity issues, make sure you follow this important step:
_f94e4522b0.png) Important Step!
Important Step!
After you copy the secret, make sure you've clicked the Save button for your new OAuth client. Users sometimes cannot connect the app successfully because their client is not saved properly.

After you click the Save button, open the new OAuth client again and make sure the secret is hidden and the Regenerate button is active.
8. Paste the Secret in the corresponding field in the SMSBump integration page with Zendesk.

Go back to your Zendesk OAuth Clients.
9. Copy your Unique Identifier and paste it in the corresponding field in SMSBump.
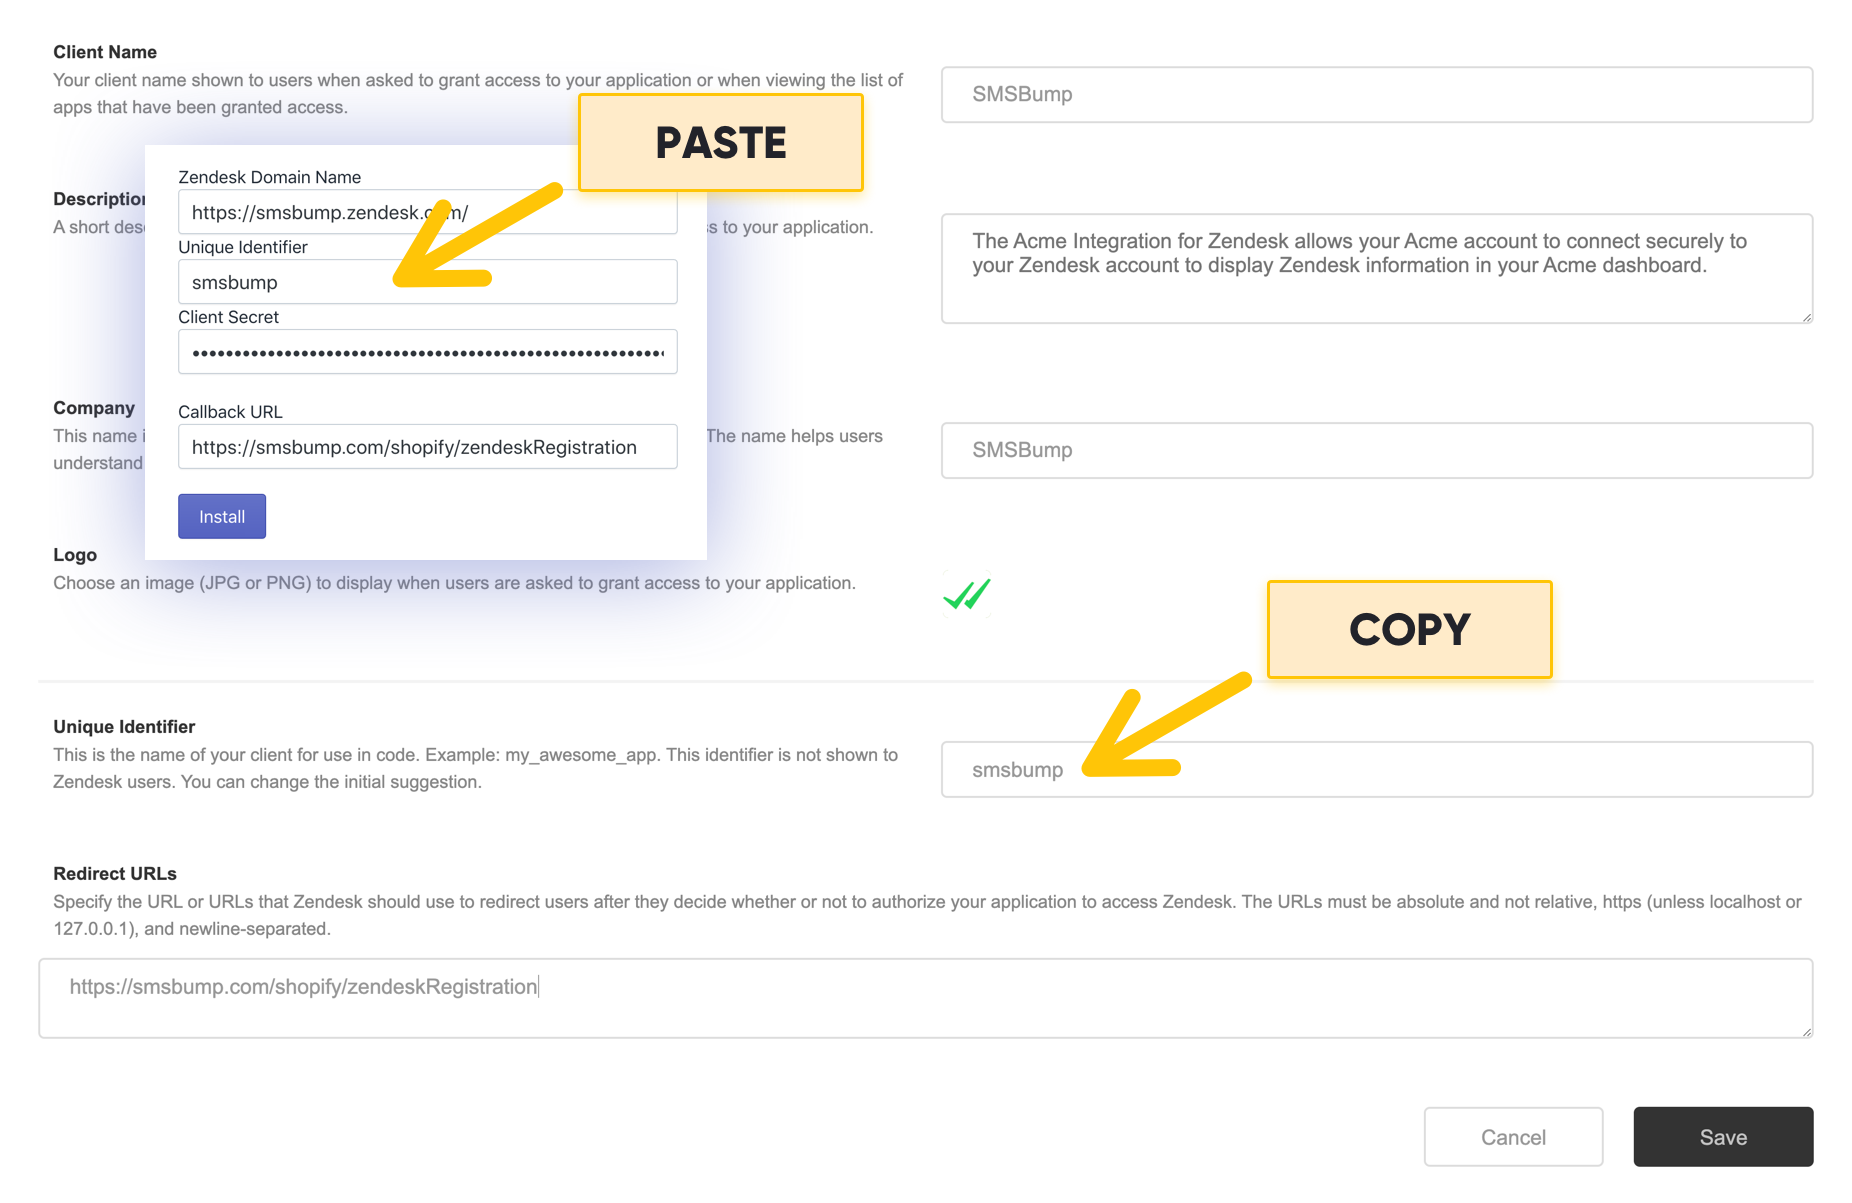
You’re ready to complete the integration!
10. Click Install to integrate Zendesk with SMSBump.
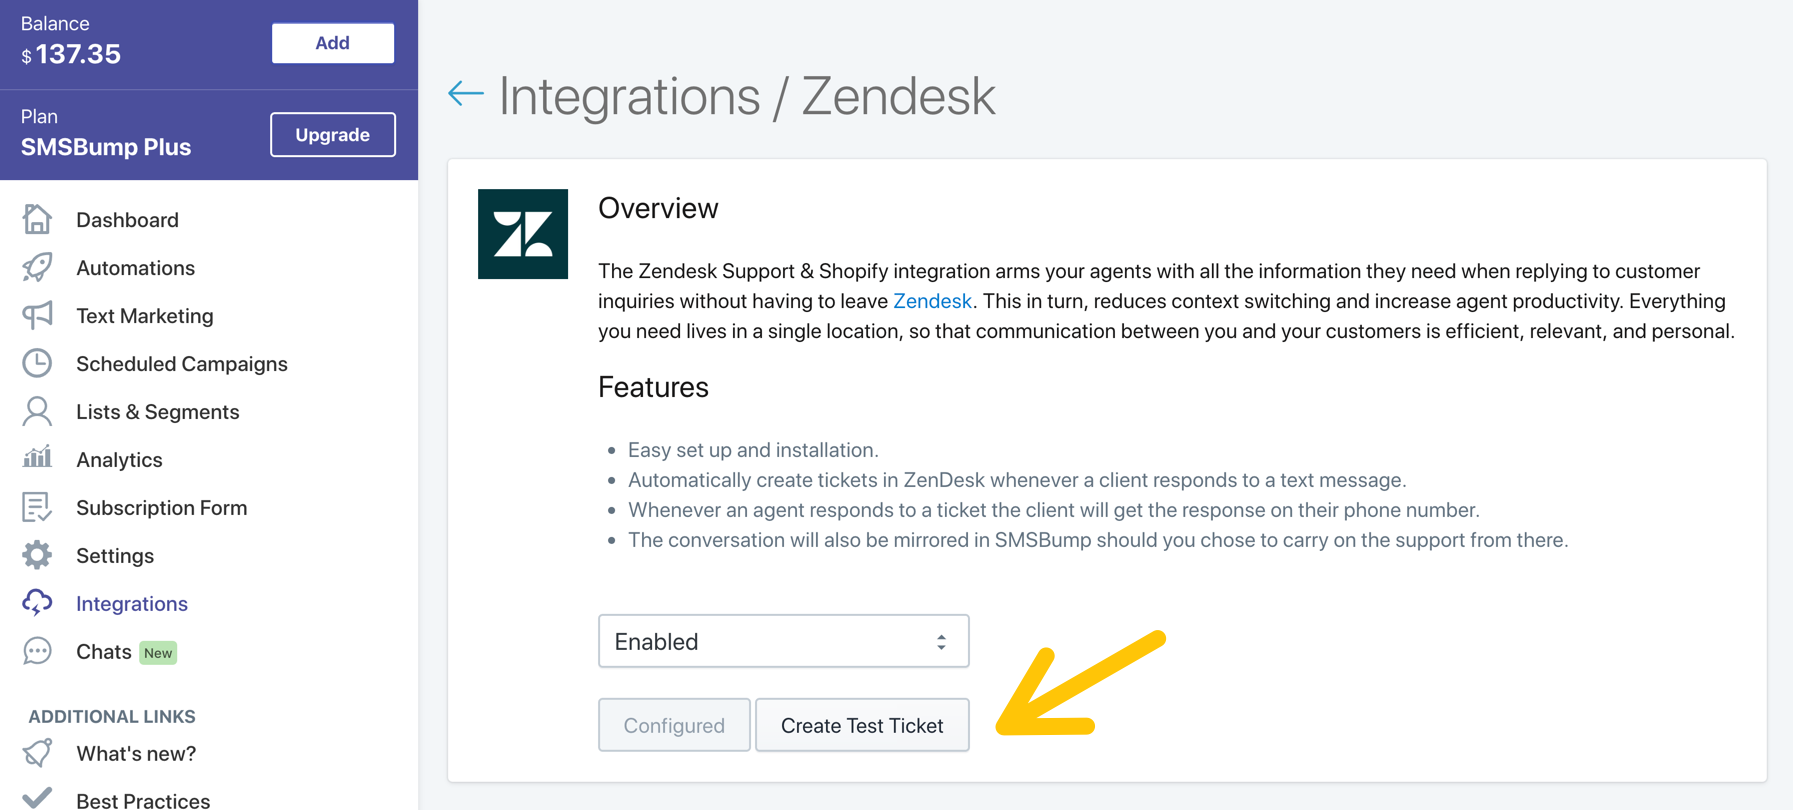
SMSBump and Zendesk Connected Successfully!
After you go through the permission approval, you will see the enabled integration with an option to enable or disable it, and one more important button - Send Test Message.
Create Test Ticket
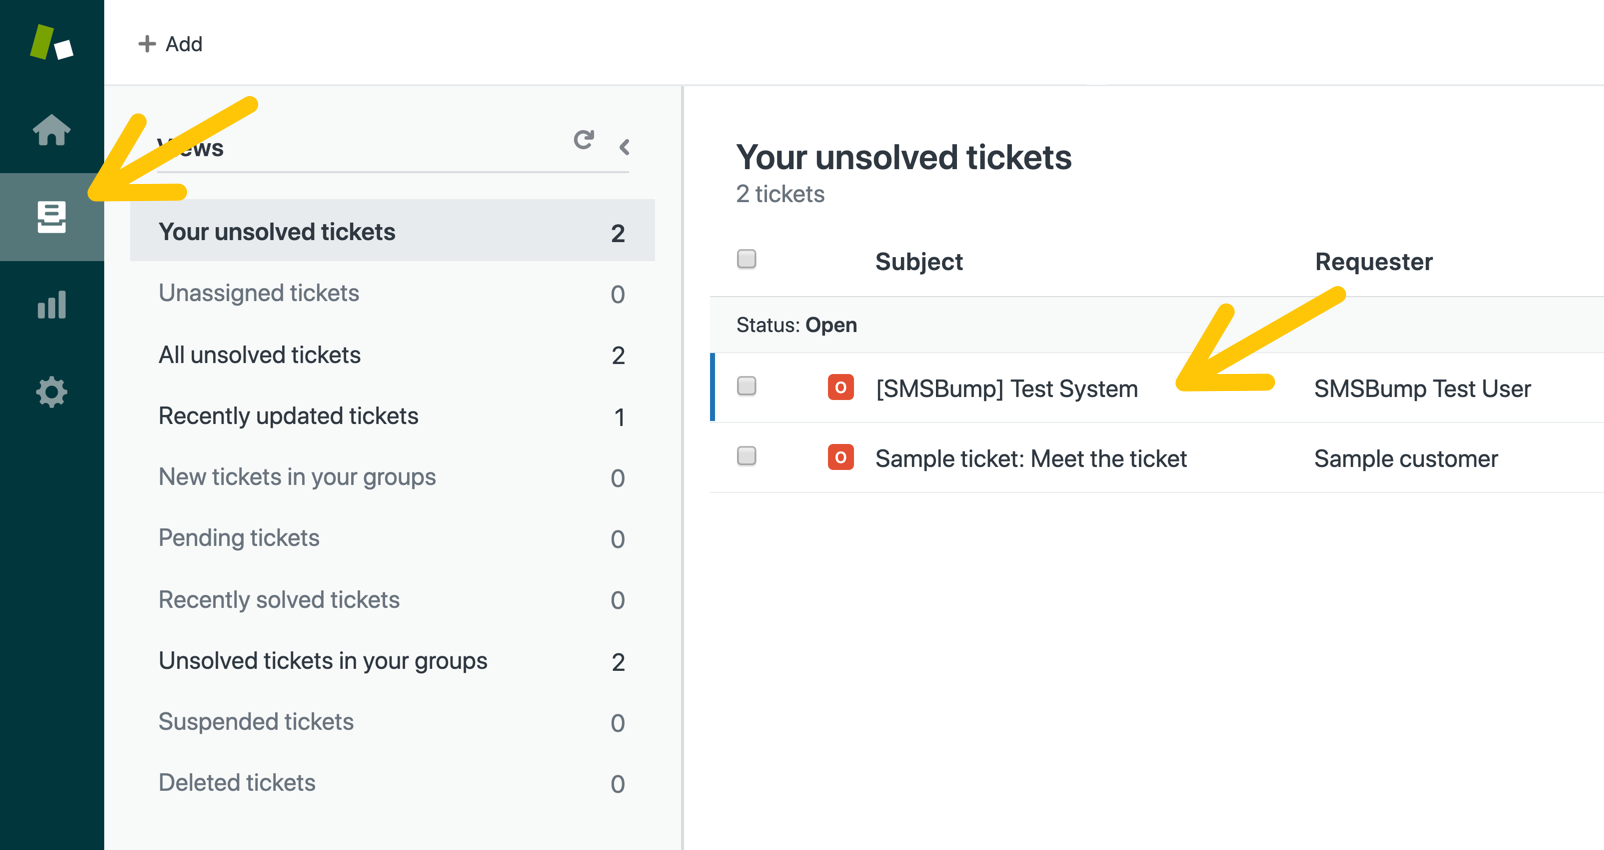
Click this to send a test ticket to your Zendesk system so you can see if everything is running well.
Open the ticket and send back a reply. This will appear in your SMS Chat where you’ll see how you’ll be interacting with customers while texting.
View & Manage Tickets
With the Zendesk features for ticket management, you will be able to maintain the SMS Chat as one of your fastest, most personal and effective support & sales channels.
This is where each text message reply in your SMSBump Chat you get from a customer will be opened as a Zendesk ticket.
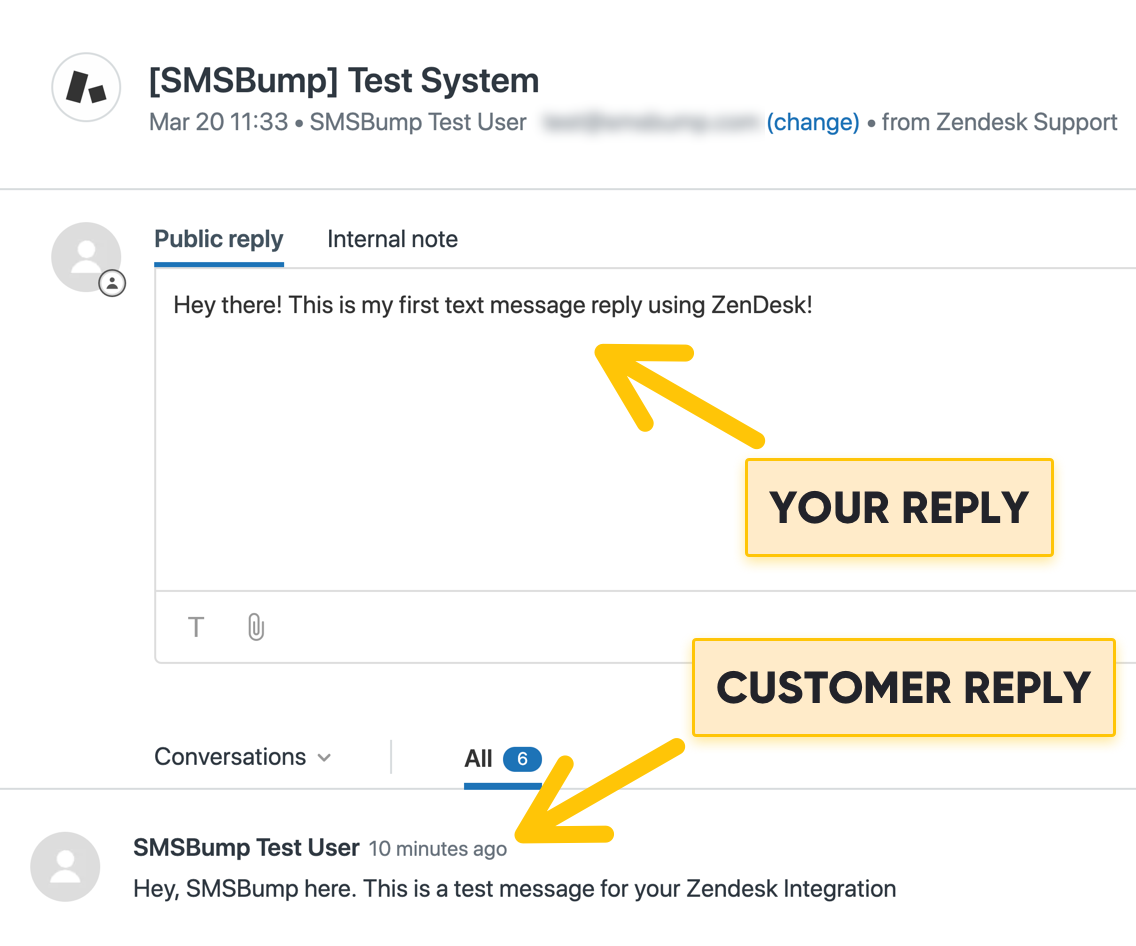
Send Text Messages from Zendesk Tickets
This is the best part of the Zendesk integration with SMSBump! The replies you post in your tickets are automatically sent straight to your customer’s phone as a text message reply.
You can take the entire conversation to Zendesk and communicate with customers using text messages you send from your support system.
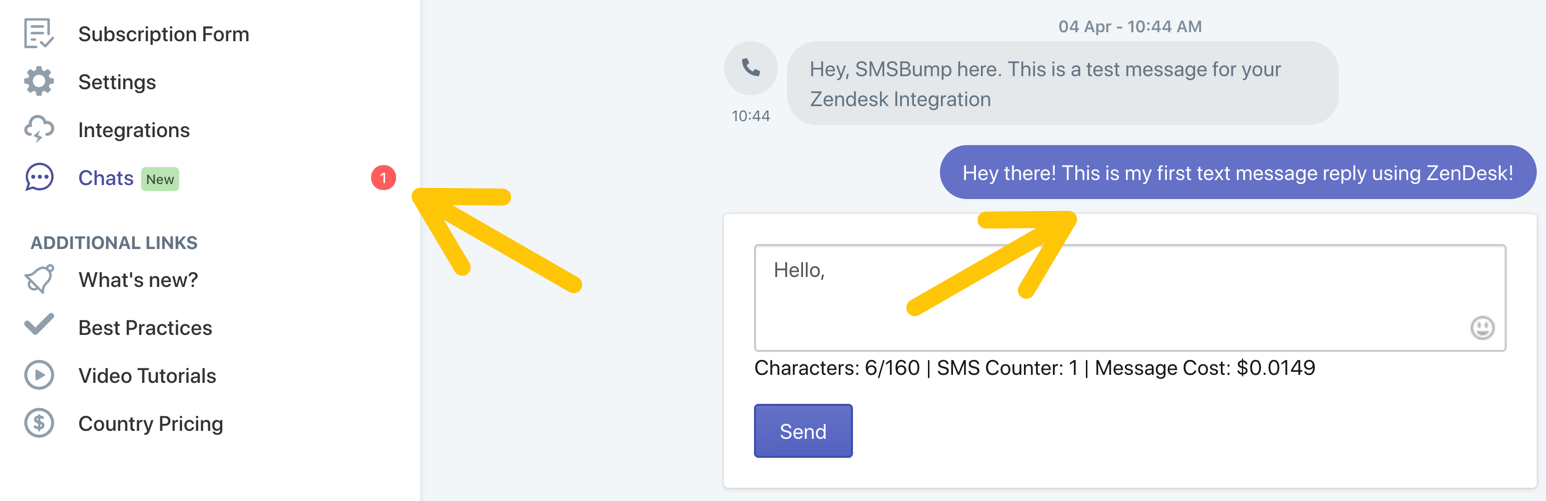
From your SMSBump Chat to your Zendesk tickets
The entire conversation can be viewed in your SMSBump Chat.
Each reply you post in your Zendesk tickets will be seen in the Chat in your Shopify app.
Let your customer service shine
You’re now ready to connect your Zendesk support system with SMSBump for Shopify and make customer service lightning fast and more effective. Increase retention, sales and customer engagement by texting with your Shopify customers straight from Zendesk!

Mihail Savov
Start growing today
Sign up today and join 90,000+ eCommerce businesses making it big with Yotpo SMSBump