Enabling and Using the Yotpo SMS & Email Chat
Enabling and Using the Yotpo SMS & Email Chat
Article Summary
Share feedback
Thanks for sharing your feedback!
Did you know that every single text marketing campaign you send can continue as a chat conversation in Yotpo SMS & Email's Chat feature?
Reach out to customers and resolve any pressing issues, answer questions on new orders, and respond to their feedback all through a user-friendly chat layout. This quick tutorial will show you how to enable and use the Yotpo SMSBump chat to deliver excellent customer experience.
Available for:
Merchants with customers based in the United States, Canada, Puerto Rico, United Kingdom, and Australia.
How it works
The chat feature is geographically limited. It requires special two-way numbers that allow shoppers to respond to your messages. Those numbers are LVN's (Long Virtual Numbers), Short Codes, or Toll-Free numbers. These numbers are assigned in a few different ways based on where your shoppers are.
For shoppers in the United States, Canada, and Puerto Rico
Every new Yotpo SMSBump user is automatically assigned such a number for the United States, Canada, and Puerto Rico. You can use Chat for shoppers in those countries.
For Shoppers in the UK and Australia
If your store is based in one of those countries, an LVN (Long Virtual Number) will be automatically assigned when you enable Chat.
If your store is not based in those countries, contact your CSM or support to assign you an LVN (Long Virtual Number).
Enabling and using Chat
- In your Yotpo SMS & Email main menu, go to Audience > Chat.
- Click Enable Chat.
The Chat feature is now enabled. Once a customer responds to one of your SMS marketing campaigns, their text message will appear on this page.
Inbox and SMS conversations
Now you can start chatting with your customers using text messages.
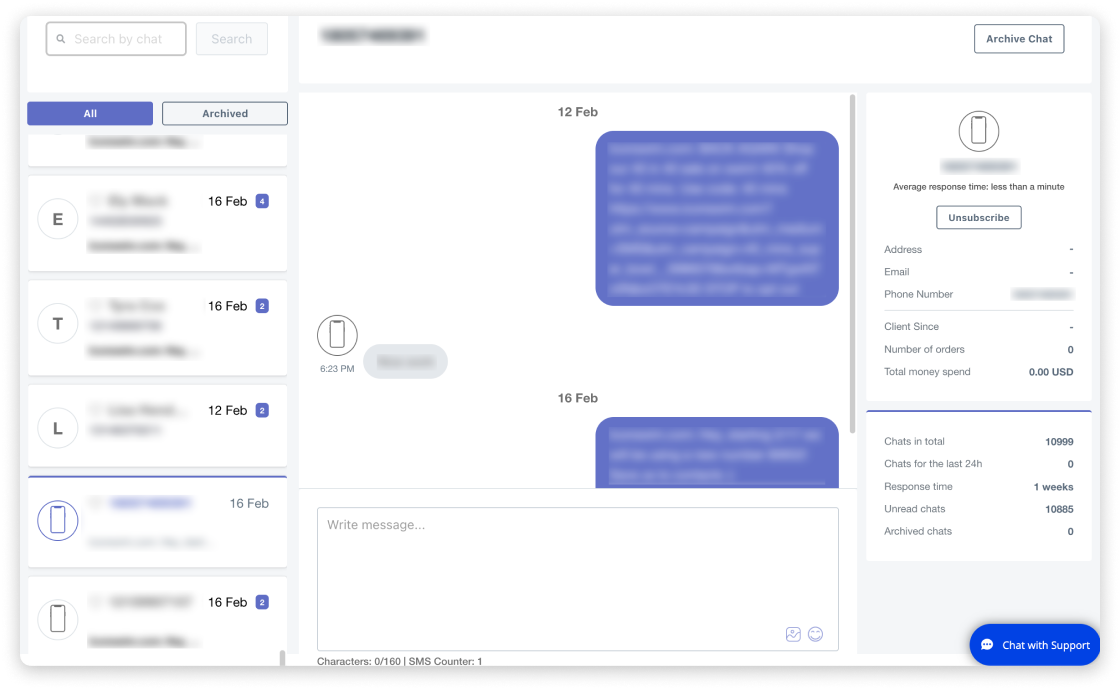
This is what the whole dashboard looks like:
- The search field and the Inbox are on the left
- The chat/conversation with a customer is in the middle
- The customer details are shown in the right section
Inbox is divided into two sections: All and Archived messages. You can easily switch between the two and quickly find what you are looking for.
You can also use the search box above and initiate specific searches through the content of all your messages.
In order to search for a specific conversation, type the customer’s phone number or name which will make the conversation appear instantly on the right.
You can mark important conversations as Favorite - by clicking on the heart icon next to the customer's name. This will put them as a bookmark on the top of the message list - disregarding time and last activity. If you want to remove a message from the top of the list, click again on the heart icon.
Customer profiles
Your customer profile has the following sections:
- Personal Information
Name: This is the name the customer used when they made an account with you.
Address: This is the address registered by the customer in his Shopify account. If you know the address of a customer, it makes it easier for you to decide whether you want to give them free shipping or another type of discount.
Email and phone number: email address and phone number the customer has used to register forto you. - Customer Behavior
Client since: this will show you how long this person has been your customer. Are they a new customer, or have they been with you for some time now. The Information here will help you decide how to approach them in the best possible way.
Number of orders: is this a regular customer or have they not placed an order in your store just yet? Knowing the total number of orders will give you a better understanding of how much this customer is engaged with you and your business. And will help you plan your retention tactics ahead.
Total money spent: shows you the total amount of money the customer has spent at your store. This stat is very important when segmenting your customers for different discount promotions. - Chat Stats
Chats in total: Shows the total number of customers who have engaged in a chat with you.
Chats for the last 24h: How many people have contacted you in the last 24 hours.
Response time: Your average time of response to messages from your customers. Fast response to requests is a crucial part of the overall customer experience. It is very important to reduce the response time as much as possible.
Unread chats: The number here better be 0 at the end of the day! :) This part of the menu shows how much unread messages you have currently in your inbox. And again – responding accurately is very important for your store.
Archived chats: The number of archived chats. If your archive chat requests as soon as they are resolved, the number here will show you a job well done!
Archiving conversations
The Archive feature allows you to tidy up your inbox by sending messages which you have already answered to in the archive folder. This helps you focus on more recent and unresolved conversations.
Open the chat you want to archive and click on the Archive button in the top right corner of the chat window. The message instantly goes to the Archived section of your Inbox.
Then you have 2 options:
- Leave it in Archive: it will remain there in case you want to deal with it in the future OR if you decide to delete it.
- Unarchive Chat: you can use this feature in case you want to bring back a certain message from the Archived to All section of your Inbox. In order to do that, click on the Unarchive chat button in the top right corner. Note that if this is an older conversation, it will not show at the very top but will be placed according to the date and time of the last message sent in it.
Deleting conversations
In order to delete a message, you first need to archive it. Then go to the Archived section, find the message and click the Delete button.
A screen will pop up, asking you if you are sure you want to proceed with deleting this conversation. If you wish to permanently delete the chat, click Delete. To go back and not delete it, click Cancel.
Unsubscribing customers
If at any time you want to unsubscribe a certain customer from your subscription list, click on the Unsubscribe button below their name in the right part of the window.

An additional dialogue box will appear for you to confirm your decision.
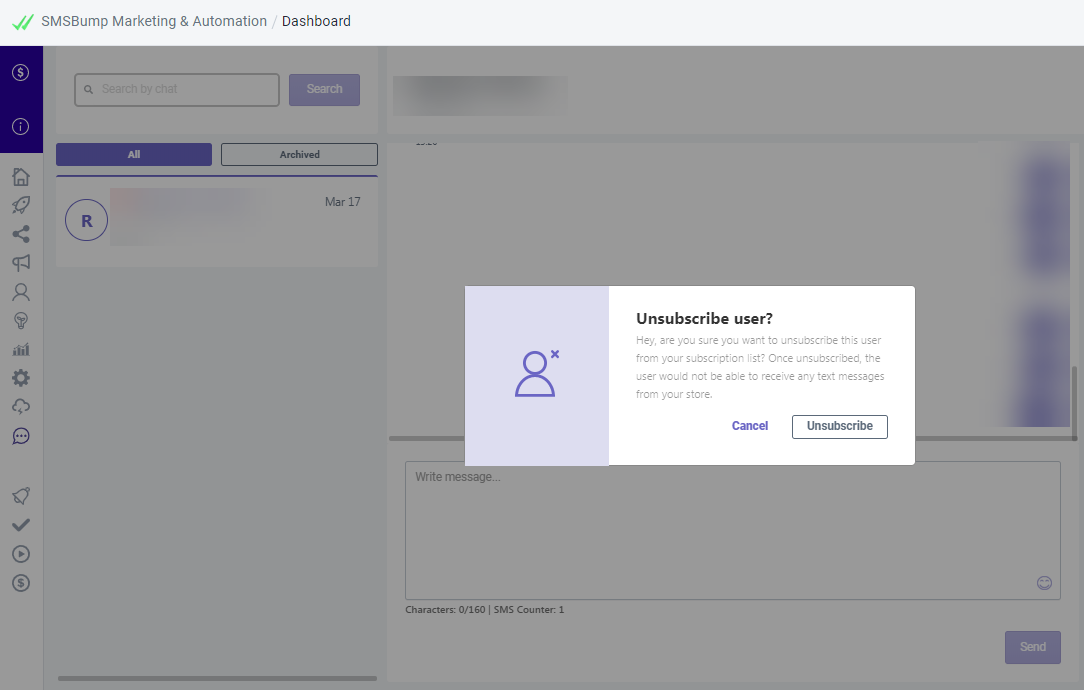
Once unsubscribed, the user won't be able to receive any text messages from you in the future.
Was this article helpful?