Creating SMS Marketing Segments
Creating SMS Marketing Segments
Article Summary
Share feedback
Thanks for sharing your feedback!
The Yotpo SMS & Email Segments help you specifically target certain customers during a text marketing campaign. This post will give you an overview of how to get started with SMS marketing segmentation for your Shopify store.
Here is the main difference between lists and segments:
- Lists are static, and its numbers increase only when you gain more subscribers
- Segments are dynamic and autofill new subscribers whenever your segmentation rules are met
Important:
You can import lists into segments and individual segments into other segments. Your possibilities are endless — you will find further information about this later on in the article. All you need is a proper marketing strategy!
Getting started
In your Yotpo SMS & Email main menu, go to Audience > Lists & Segments.
You'll see a few predefined lists and segments.
- Text marketing list: This is a list of everyone gathered from your subscription form, keyword, and check out opt in.
- Engaged customers: This is a segment of customers who have clicked on a link in an SMS.
- Converted customers: This is a segment of customers who have made a purchase.
Creating a new customer segment
- Click Create new to create a new segment.

- Under the Type drop down menu choose Segment and give it a name under Enter a unique name for your segment.

- Click Create to save your segment. Your segment has now been created.


Select Segmentation Filters
Under Select filter, you will be able to choose from a number of different segment filters. We have created instructional blog posts, so you can click on the desired filter to learn how to set it up.
- Customer behavior
- Customer attributes
- Location based
- SMSBump properties
- Order Info
- Integrations
- Email actions
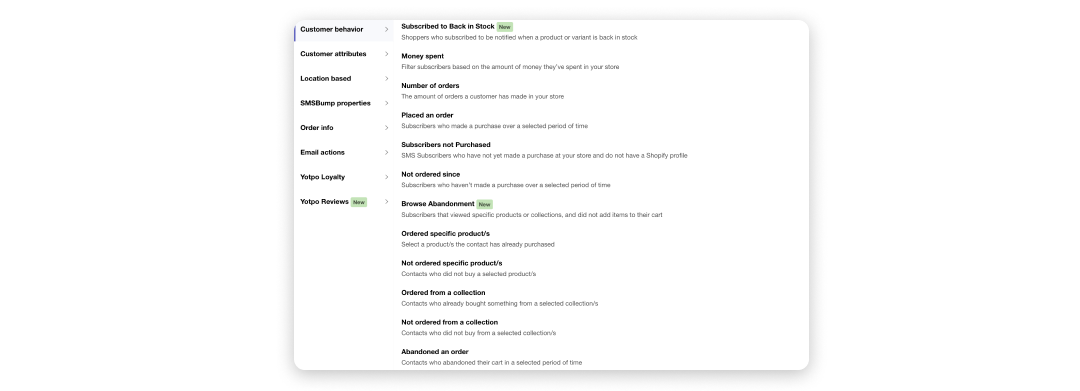

Click on the desired Segment rule according to your marketing strategy, and fill in the required fields.
For example, choose Money spent like we did in the image below to create a segment containing all the customers in your Shopify store who spent more than $60.
You can combine this with all of the other segmentation rules to narrow down your audience based on traits such as location, previous SMS interactions, or product interests.

You can add additional filters by clicking on the +AND and +OR buttons
Once you are happy with the rules you’ve set, click on Save.
Congratulations! You have now created a segment following a specific set of rules.
Actions

Your new segment will now appear under Lists and Segments. Under Actions, you will be able to:
- Edit segment rules: Delete or add new rules to your segment
- Update contacts: Manually refresh and update the contacts who fit the segment rules
- Send campaign: Send a text marketing campaign to the customers in your segment
- Delete: Delete the segment
Was this article helpful?