Setting Up and Using Smile in Yotpo SMS & Email
Setting Up and Using Smile in Yotpo SMS & Email
Article Summary
Share feedback
Thanks for sharing your feedback!
Would you like to excite your customers with reward points or dollars so they can save on their next purchase? The Smile integration in the Yotpo SMS & Email app will allow you to create automations that remind customers to spend their rewards, as well as make segments that include customers with reward points for specific text marketing campaigns.
This post will cover how to install the Smile app and create a new automation and segment.
How to Connect Smile and Yotpo SMS & Email
To connect Smile and Yotpo SMS & Email, you first need a registered account in Smile. Afterwards, follow the simple 5-step process below to install and sync the Smile app with YotpoSMS & Email.
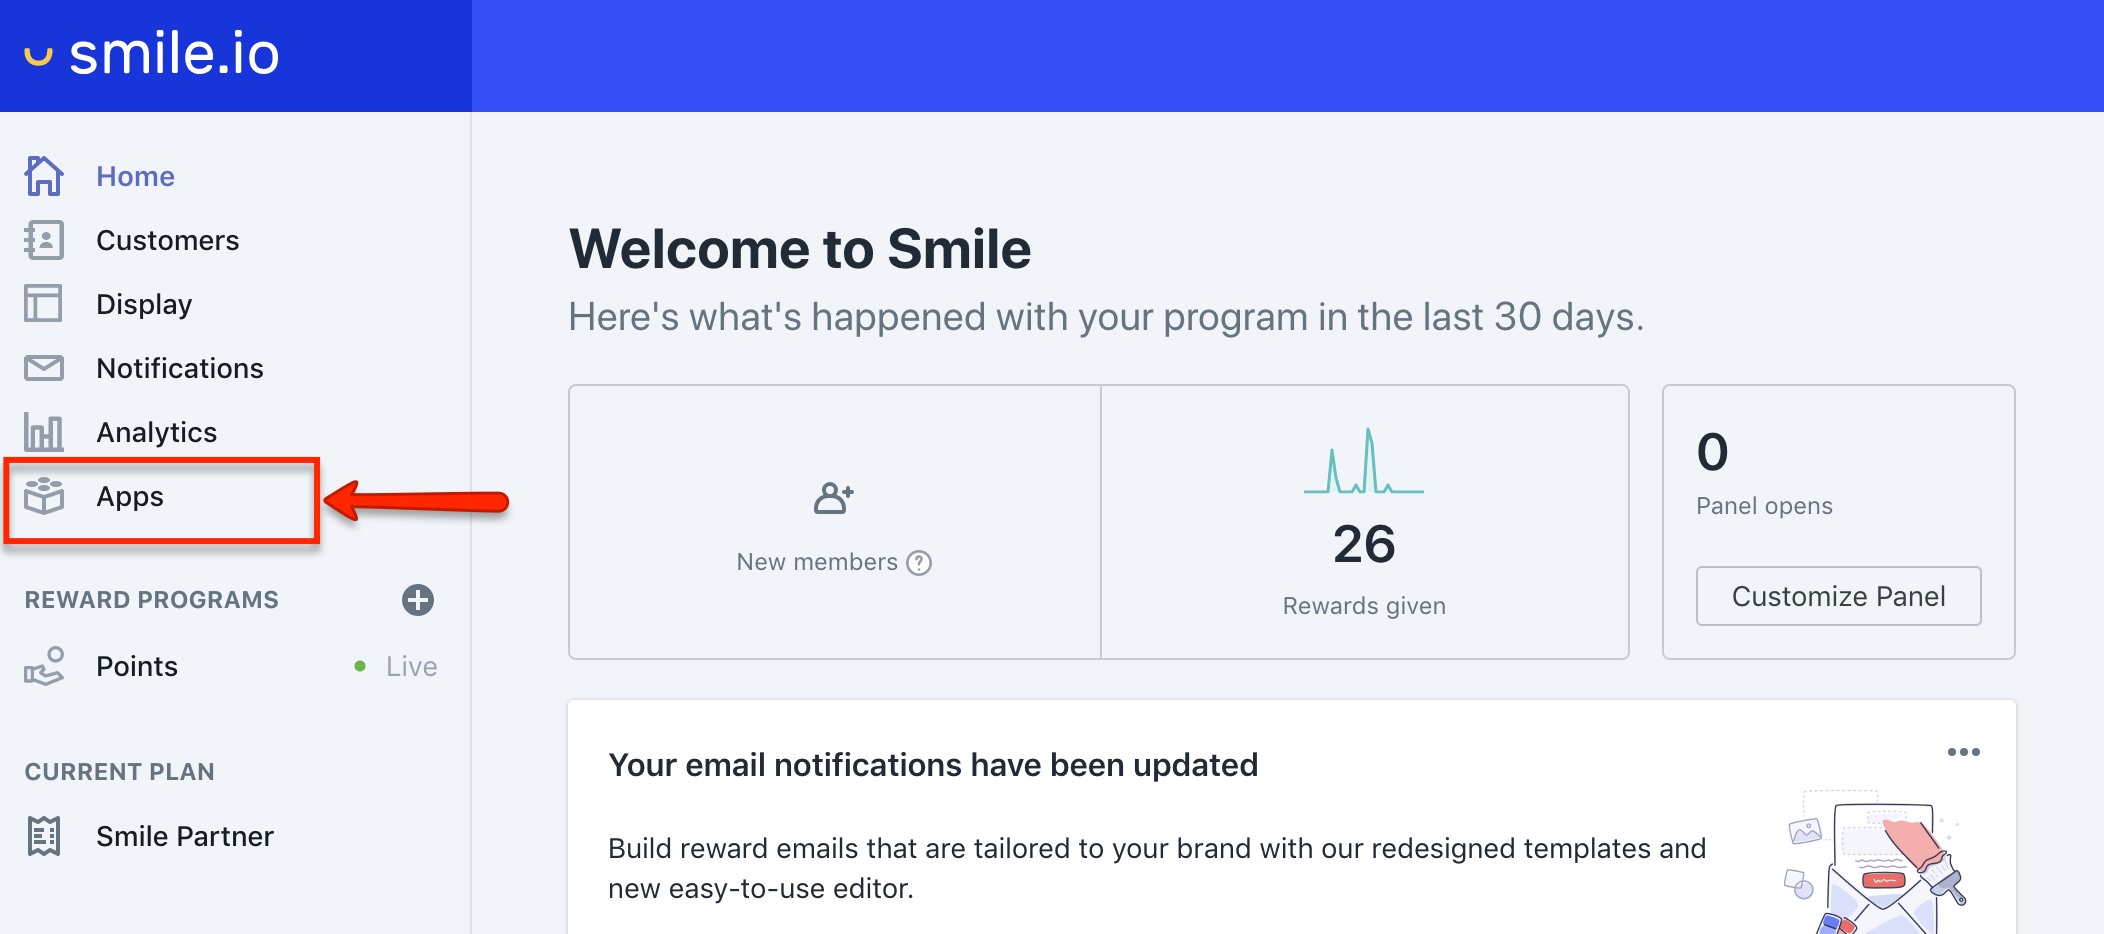
- Log into your Smile.io account and click on Apps on the side menu.
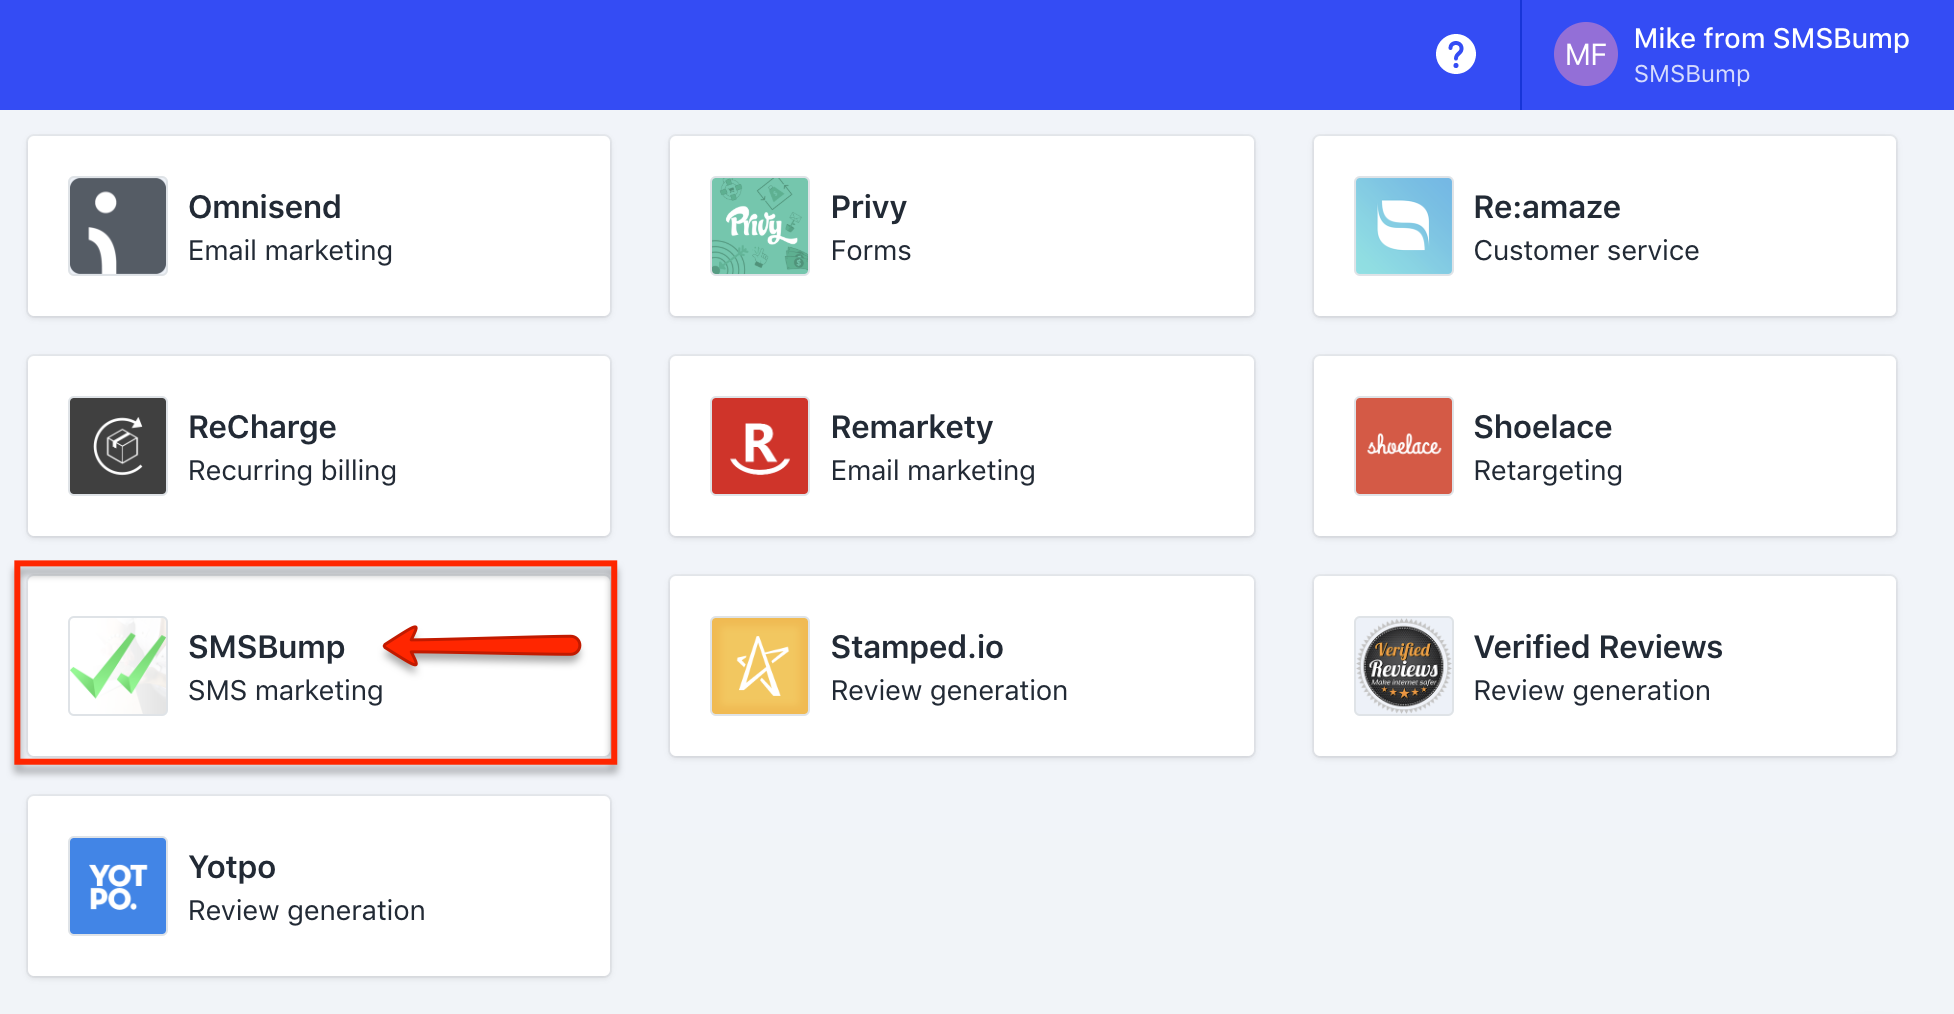
- Click on the Add app button.

- From the list of displayed apps, select SMS & Email.
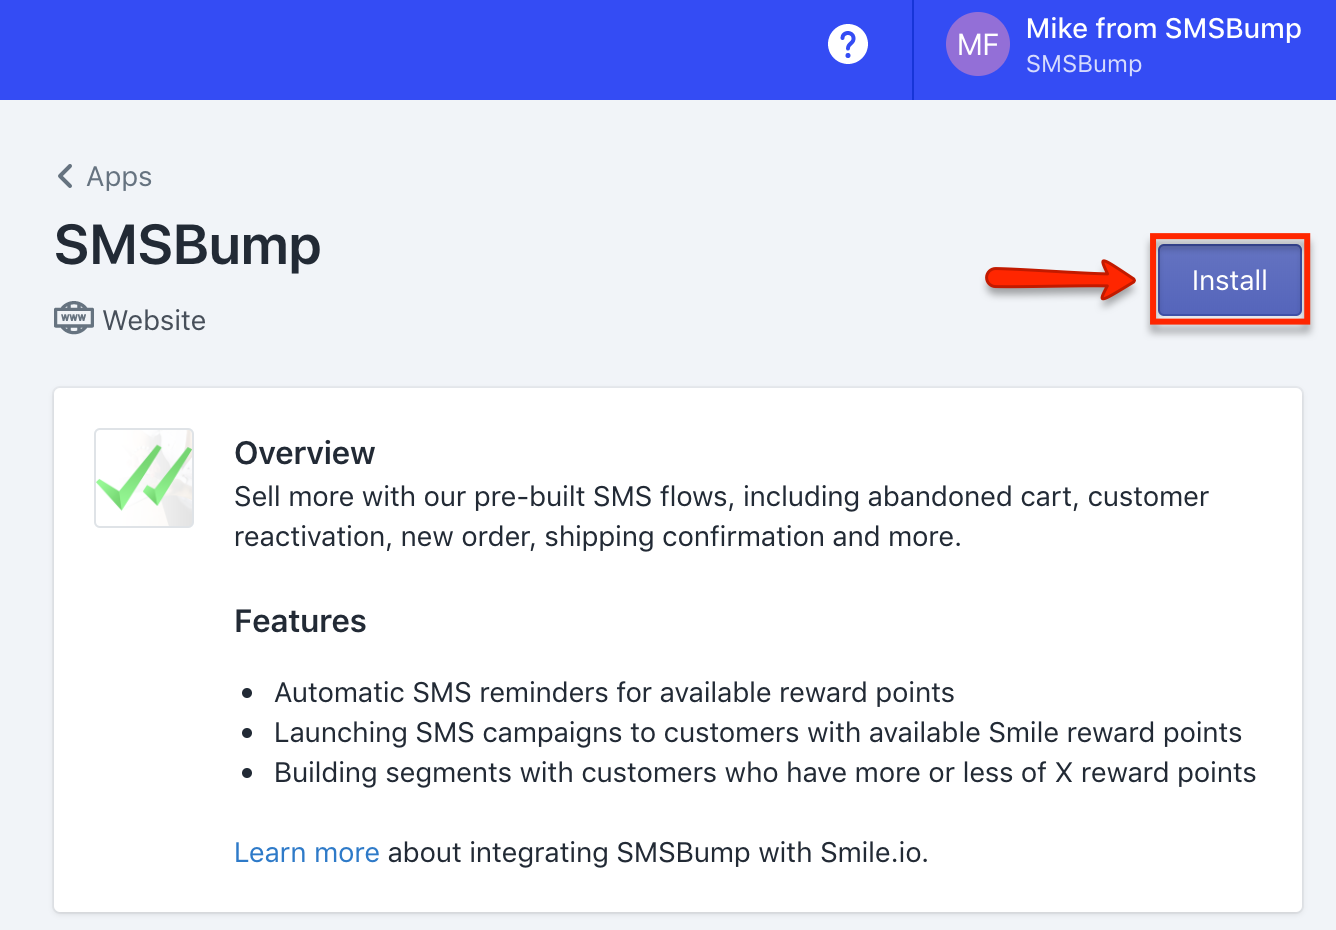
- Read the overview and features and then click on Install.
- Click on the Authorize button to grant permission for SMS & Email to read customer data.
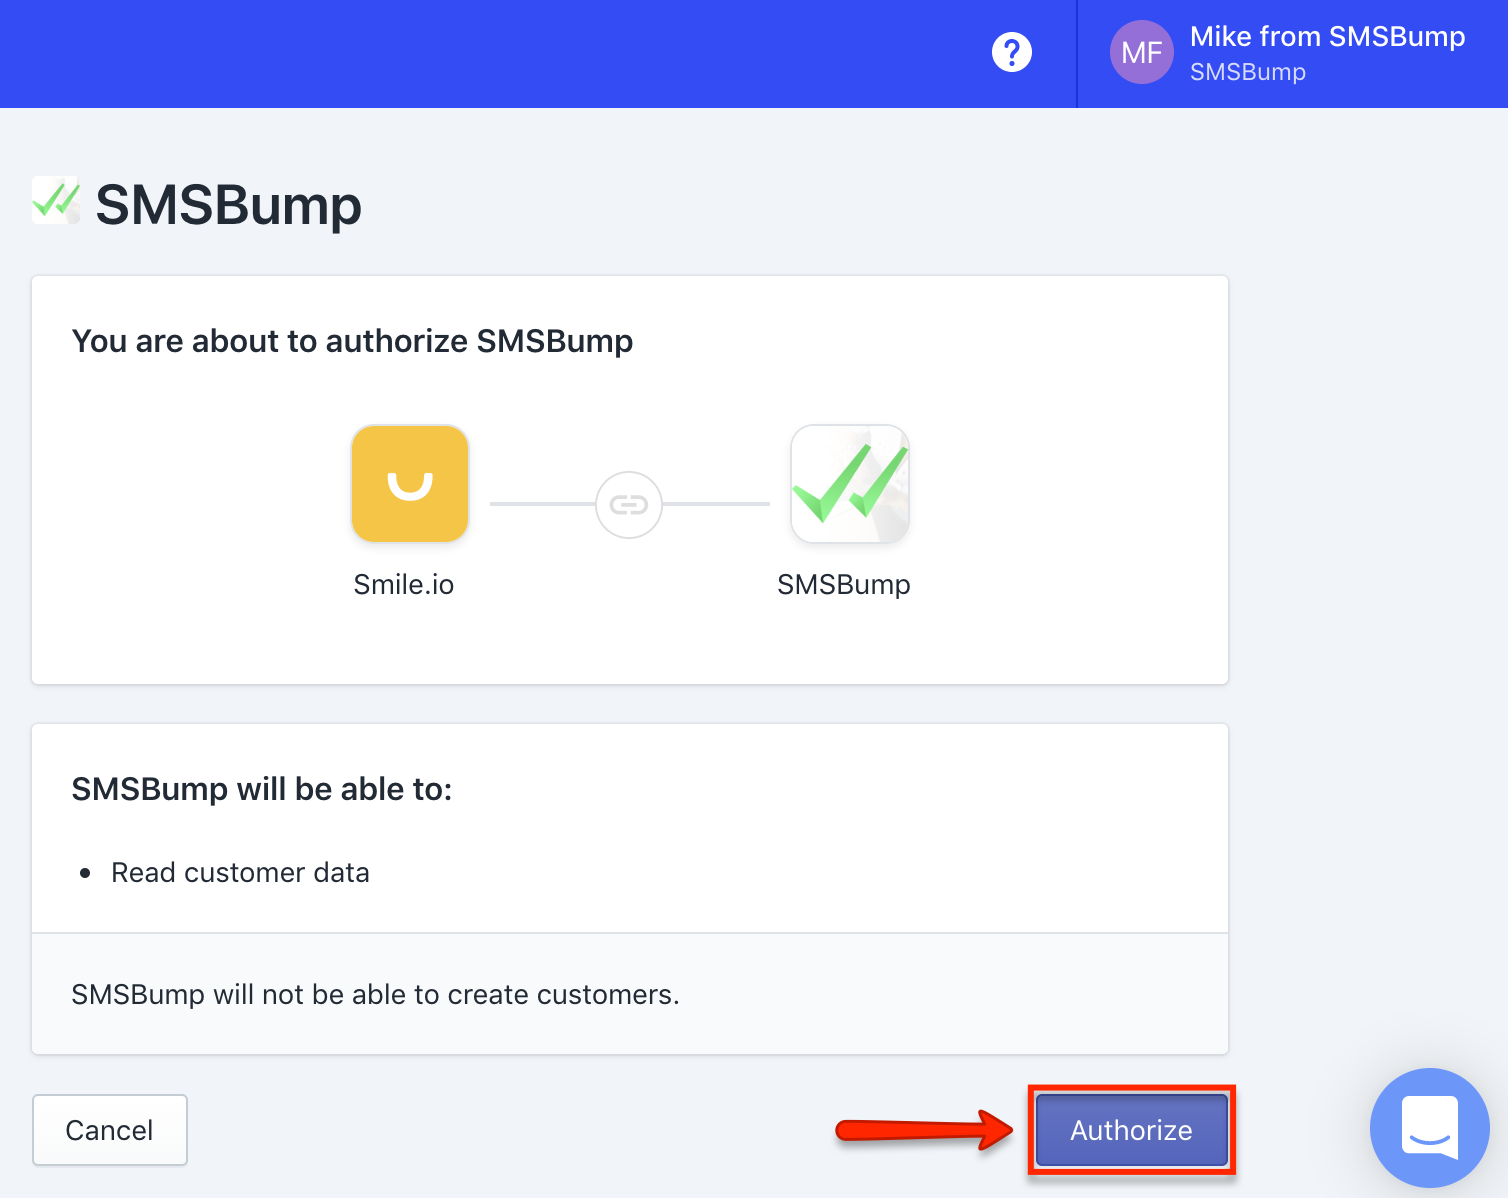
- Congratulations! Smile has been installed and synced with the SMS & Email app in Shopify.


Setting Up Your First Smile Automation
To configure your first Smile automation, go to Automations in your Yotpo SMS & Email side menu and hit Create New. 
For better campaign tracking, give your automation a name. We named ours First Smile Automation. 
Next up, from Automation Type find the available Smile automations and select which one you’d like to start with: Smile Reward or Smile Referral automation. In our case, we will begin by setting up a reward automation.

Smile Reward Automation
Once you’ve selected this automation type, you can configure what will trigger it, if you are only looking to send it to people who meet certain criteria. In this case, you need to set up the reward threshold that will launch the automation, or in other words how many points does a subscriber need to generate before receiving your notification. To do that, you need to first Enable it. Then you can choose an exact number, or specify a minimum and maximum threshold with the “More than” or “Less than” rules. In the Amount box you type in the number of reward points. 
In the Recipient field you can configure who would be receiving your notification but in this case this option is defaulted to Customer, as they are the ones who would be receiving your reward message.

The field that follows is where you begin crafting the content of your message, starting with the visuals. For all of your US customers, you can attach a GIF from GIPHY, a high-res image from Pexels, hit Browse or simply drag to upload an image of your own, one that best represents your brand. 
Keep in mind that MMS is currently available only for US-based customers and they increase your character count from 160 to 1600. While you have the freedom to go wild with your message, we still advise you to keep it short and sweet. The Text message field is where you will start putting together your actual message. We’ve provided you with a short default message that you can either leave as is or tweak to your liking. With the help of the available short codes, you can provide customers with all the necessary information, such as who is sending this message (your {StoreName}), how many points they’ve accumulated (with the {SmileRewardPoints} shortcode), and a link to your website ({SiteUrl}) where they can go and use them. Don’t be alarmed - these short codes will be substituted with actual data in the text message your customers will receive. 
Important:
Make sure not to copy and paste short codes from one automation to the other as they will not work. Only use the short codes made available for the specific automation.
Use emojis to give your message a friendlier vibe. Click on the smiley face to select an appropriate one out of the wide range of emojis available. Keep in mind that emojis reduce character count from 160 per SMS to 66.

And finally, don’t forget to always give customers the option to unsubscribe from your service by checking the Add STOP to opt out box, otherwise, you won’t be in compliance with the TCPA and CTIA regulations.

All good? Great! On the right, you can preview how your message would look like but to test it further you can also send yourself (or the staff numbers you’ve specified in your Shopify Settings) a Test message. Simply click Test and select which number to send the message to. If you’d like to add a different contact, click Add more test numbers and we will redirect you to the page where you can do that.

Important:
Test messages will show the short codes, as opposed to the actual data that will substitute them in the message your customers will receive.
Once you have selected the number/s you wish to send the message to, hit OK and expect your message.
If, on the other hand, you’d like to proceed to sending your message to customers, click on Save. You will then be asked to approve a change we will make in regards to the opt-out option. Since customers outside of the US and Canada cannot unsubscribe by replying STOP, we will replace the unsubscribe text with a link for them which will add 12 characters to the text. You will be able to preview the changes before you accept. When ready, click Good, make the change to approve of the amendment, or if you don’t do business outside of the US and Canada - simply choose No, keep the “STOP” keyword!

Once you complete this step, your first Smile Rewards automation will show up with the rest of your active or inactive automations. From here, you can:
- Change it’s status from the down-pointing arrow and have it either be Active or Inactive
- Edit it by clicking the blue pencil button
- Check its performance in your Yotpo SMS & Email Analytics panel
- Delete it
Now let’s go back and configure the second Smile automation which will allow your subscribers to refer their friends and family, and win bonus points.
Smile Referral Automation
To set up a Smile Referral Automation, follow the same exact steps as above. Give it a name, select the right event from under Automation Type - in this case it would be Smile Referral Program, and then proceed to configure the amount of reward points a customer has to have generated for the automation to fire. As with the Smile Rewards Automation - you can either choose an exact amount of points, more than or less than a specific number.
The next field, Recipient, is again defaulted to be your Customer.
With the Smile Referral Automation you can also set a Delay in case you want a certain time to pass before your customers receive your message. If you’d like to set a delay, simply hit Enabled and then configure the timing.

The steps that follow are identical to the ones with the Smile Reward Automation - you can attach a visual and tweak your text message to your liking, add an emoji and use the shortcodes to provide valuable information. The difference here, though, is that you have one more designated short code - the {SmileReferralUrl} which will be substituted with a link that your customers can give their friends and family, and earn additional reward points. 
Before you continue on to testing or saving your automaton, don’t forget to add the opt out lingo by selecting the Add STOP to opt out checkbox.
The rest is the same as with the Smile Rewards Automation. To finish off, let’s also show you how you can create a segment that will populate itself only with customers who have reached a certain rewards points threshold, specified by you.
How to Create a Smile Reward Points Segment
Creating different segments based on accumulated reward points can give your brand very important information about your customers: what portion of them are loyal to you and make repeat purchases, what portion of them buy from you occasionally, and what part of them are one-time buyers.
Splitting them into different segments based on that is both easy and efficient, as it will make targeting much more on-point. To create a Smile Rewards segment, go to Lists and Segments from your Yotpo SMS & Email dashboard and click on Create New. 
Under Type select Segment, and then give your segment a memorable name. This will help with tracking later on and will help you distinguish them when you have multiple ones. For the purpose of this tutorial, we will name ours Smile Reward Points 2020. Hit Create when you are ready. 
Next up, you will be taken to the page to set up the criteria customers need to meet to be added to this particular segment. From the Select Filter dropdown menu, scroll all the way down to the Smile reward points filter. 
To configure the threshold at which customers will be admitted in this segment, simply select if you want that to be Equal to, More than or Less than, and specify a number, depending on the purpose of your segment.

Only customers who have reached the particular amount of reward points will be entered in this segment. Now, you can call it good and only have this one filter active for this segment, or you could make it narrower by adding additional rules. This way the segment will only include customers who fit very specific criteria, limiting the number of subscribers in it, but will also make your targeting more on-point. If you wish to create additional filters, simply hit the Add filter button and select the one you’d like to apply. Refer to our knowledge base article to learn more about each fitler.

Once you are ready, click Update Rules to finalize your segment. 
Your new segment will appear with the rest of your segments and will start auto-filling itself soon after, that is if you have customers who meet your criteria, of course. From here on out, you can either View your segment to see the contacts that have been added, update the rules and export the segment, or you can click the three dots to:
- Update rules: make changes to the filters you’ve selected
- Send campaign: to launch a text marketing campaign that will target this particular segment of people
- Edit name: change the name of your segment to make it more memorable or easy to track
- Delete it

Was this article helpful?